The easiest way to Hanging Ornaments From the Ceiling is to tie shatterproof baubles to clear fishing line at different lengths and attach the lines to small adhesive ceiling hooks or a suspended branch, hoop or tension rod. Keep the lowest ornament at least 7 feet (84 inches) above the floor in walkways, and 24 to 30 inches above a dining table so guests can see each other. Start with one defined spot – a window, a corner, the table – instead of scattering ornaments across the whole ceiling.
Here is the thing most ceiling displays get wrong: they start with the ornaments. The ones that look expensive in real life start with three boring decisions – where the display lives, how low it can safely drop, and what is actually holding it up. Get those right and even a $15 box of shatterproof baubles looks deliberate. Get them wrong and the prettiest glass ornaments in the store end up bumping heads, blocking views, or on the floor by December 10.
This guide gives you both halves: the practical system first, then 19 ideas grouped by the spot they suit best. Every idea lists where it works, how low to hang it, how long it takes and what it costs in effort – so you can pick one, shop once, and finish it in an afternoon.
Before You Hang: Clearance, Scale and Support
Measure first, decorate second. Two numbers decide almost everything: your ceiling height, and the eye line of the people underneath the display.
The clearance rules that keep a display comfortable
- Hallway, entry, any walkway: Lowest point at least 7 ft (84 in) above the floor. Nobody brushes it, doors still swing, and it reads as a canopy instead of an obstacle.
- Above a dining table: 24-30 in above the tabletop. Low enough to feel intimate, high enough that guests see faces across the table.
- Window display: Finish 6-12 in above the sill. Keeps ornaments off radiators and plants, and lets daylight flow under the display.
- Corner or beside furniture: Can drop to 12-18 in above the furniture top. No one walks there, so this is where the longest, most dramatic drops belong.
- Stair hall: Follow the slope of the handrail, never below it. Keeps the flight path clear on the side people actually use.
Four ways to hold it up – pick by weight, not by habit
- Adhesive ceiling hooks: Best for renters, single strands. Light ornaments only – follow the weight rating on the pack. No holes. Clean the spot, press, and wait the full curing time before hanging anything.
- Small screw-in cup or eye hooks: Best for branches, hoops, garland rows. Heavier group displays, especially screwed into a joist. The strongest everyday option. Pre-drill a pilot hole; a hook in plaster alone is far weaker than one in wood.
- Tension rod, beam or curtain rod: Best for window displays, rentals. Light to medium strands spread along its length. Zero ceiling contact. The perfect frame for the woodland branch and candy curtain ideas below.
- An existing chandelier or pendant: Best for above-table clusters. A few lightweight ornaments tied to the frame only. Never hang weight from the electrical cord, and never assume a fixture can carry a branch or hoop.
Weigh the whole thing, not the prettiest piece: the support carries the branch, greenery, lights, cords and every ornament together. If you would not hold it in one hand for a minute, it does not belong on one adhesive hook. Renters: no screws at all. If it cannot go up with adhesive hooks, a tension rod or a curtain rod, skip it.
How to Hanging Ornaments From the Ceiling in 7 Steps
This is the process behind every idea in this guide. Learn it once and you can build any of them – and take them down in January without a single ornament casualty.
- Build it on the floor first. Lay the branch, hoop or imaginary outline on the floor and arrange the ornaments inside it. You will spot the gaps and the one ornament that is too big in thirty seconds – work that takes twenty frustrating minutes on a ladder.
- Mark the ceiling lightly. Painter’s tape marks where each hook goes. Step back, check the marks from the doorway and from a chair, then commit. Tape forgives; holes do not.
- Install the support and let it set. Screw hooks into a joist where you can, and give adhesive hooks their full curing time. Tug each one firmly before trusting it.
- Cut your lines at uneven lengths. Clear fishing line (monofilament) disappears; thin ribbon shows on purpose. Cut drops that vary by 2 to 6 inches. Perfectly even rows are the number one reason home displays look like a shop window instead of a home.
- Hang large to small. Biggest ornaments first, at the visual center or the ends, then fill with medium, then tuck the small ones into the gaps. Odd numbers – threes and fives – group better than pairs.
- Check the sightlines sitting down. Sit where guests will sit. If an ornament sits exactly at eye level or blocks the person opposite, shorten that one line. This two-minute check is what separates a display people photograph from one they duck around.
- Secure the swing. In a hallway or near a door, air movement will set light ornaments swaying and clicking together. A tiny dot of removable adhesive putty on a neighbor strand, or slightly heavier ornaments at the ends, calms the whole group.
Safety checklist – read this before the ladder comes out
Choose shatterproof over glass anywhere people walk, sit or reach. Save real glass for high window displays out of reach. Use only light sets that have been tested for safety, and inspect cords for damage before hanging. Follow the indoor or outdoor rating on the label – the U.S. Consumer Product Safety Commission repeats this every holiday season because it is where fires start. Keep small, removable ornaments and food-look decorations out of reach of small children and pets. Candy-look ornaments (ideas 13 and 14) belong high, in homes with toddlers – or not at all. Keep paper, ribbon and greenery away from candles, fireplaces and heaters. Use flameless candles anywhere near a hanging display. Never overload a light fixture and never hang a display from a smoke alarm, sprinkler or vent.
The 10-minute test: hang the display, then live with it for one evening before adding more. Most displays need less added, not more – and you will know exactly where the one empty gap is.
Window and Corner Displays (Ideas 1-4)
Windows and corners are the beginner’s best friends. The frame does half the design work for you, the drops can be long, and nobody walks through them.
1. Hang a woodland ornament curtain above the window
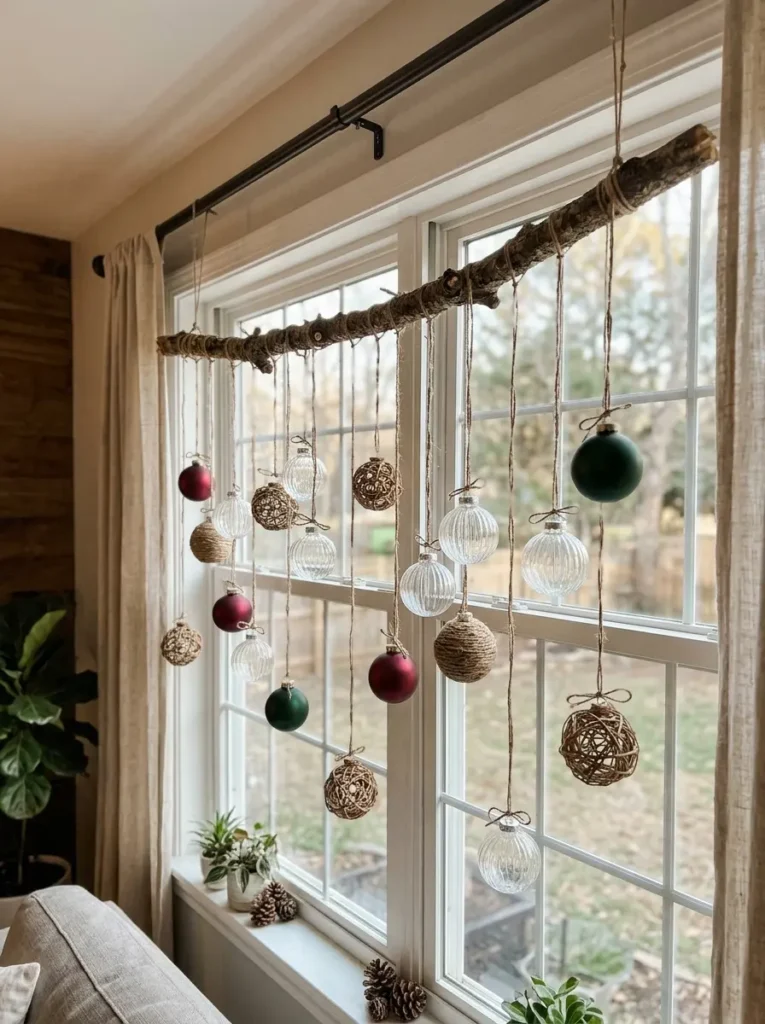
- Best for: living room window | Drop: 12-30 in from the branch | Time: 45 min | Level: easy
Suspend a rough branch – real, or a convincing faux one – just inside the window and hang clear, ribbed and woven ornaments from it on jute twine. The branch gives the display a strong, uneven top edge, and the clear baubles let daylight stay part of the picture instead of blocking it. Balance two or three deep green or cranberry ornaments across the width so one side does not go dark. - Pro tip: hang the branch from the curtain rod or a tension rod and this entire display needs zero ceiling hooks.
2. Make a red-and-white cascade in an empty corner
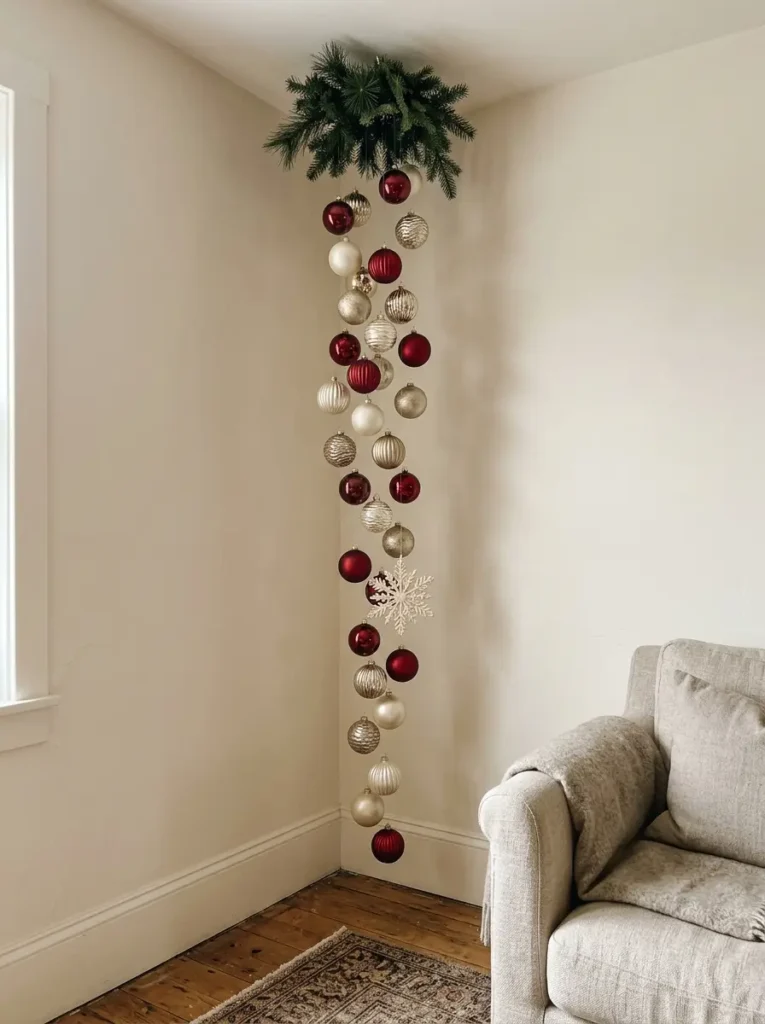
- Best for: the corner beside a sofa or armchair | Drop: up to 36 in | Time: 30 min | Level: easiest
Start with a small evergreen cluster at ceiling height, then let red, ivory and muted-gold ornaments descend in a narrow column that tapers toward the bottom and finishes beside the seating. Mix finishes on purpose: a ribbed bauble catches light on its edges, a matte one reads as a clean shape, a shiny one mirrors the room. Drop one larger snowflake into the run of circles.
3. Hang a red-and-ivory mobile with snowmen and little houses
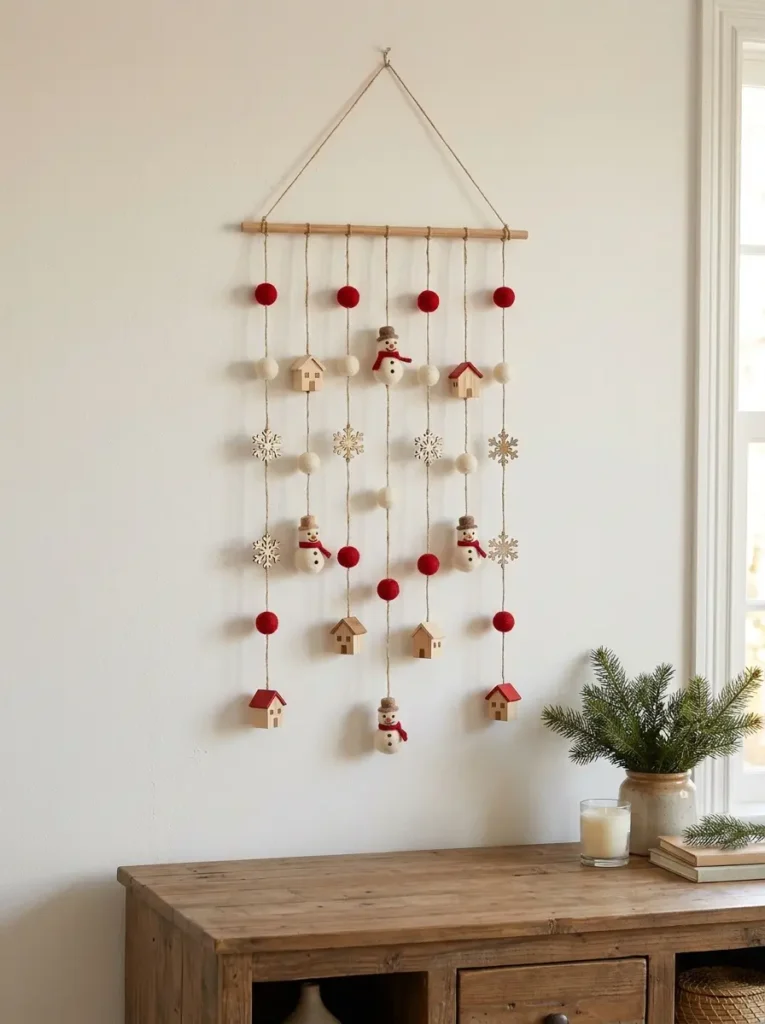
- Best for: above a sideboard or console | Drop: 10-22 in | Time: 40 min | Level: easy
A slim wooden dowel, red and ivory felt balls, tiny wooden houses, snowflakes and two or three snowmen. Alternate the shapes along strands with different end points and leave some cord showing so each silhouette stands apart. Against a plain wall this reads from across the room.
4. Let ornaments spill between floating gift boxes
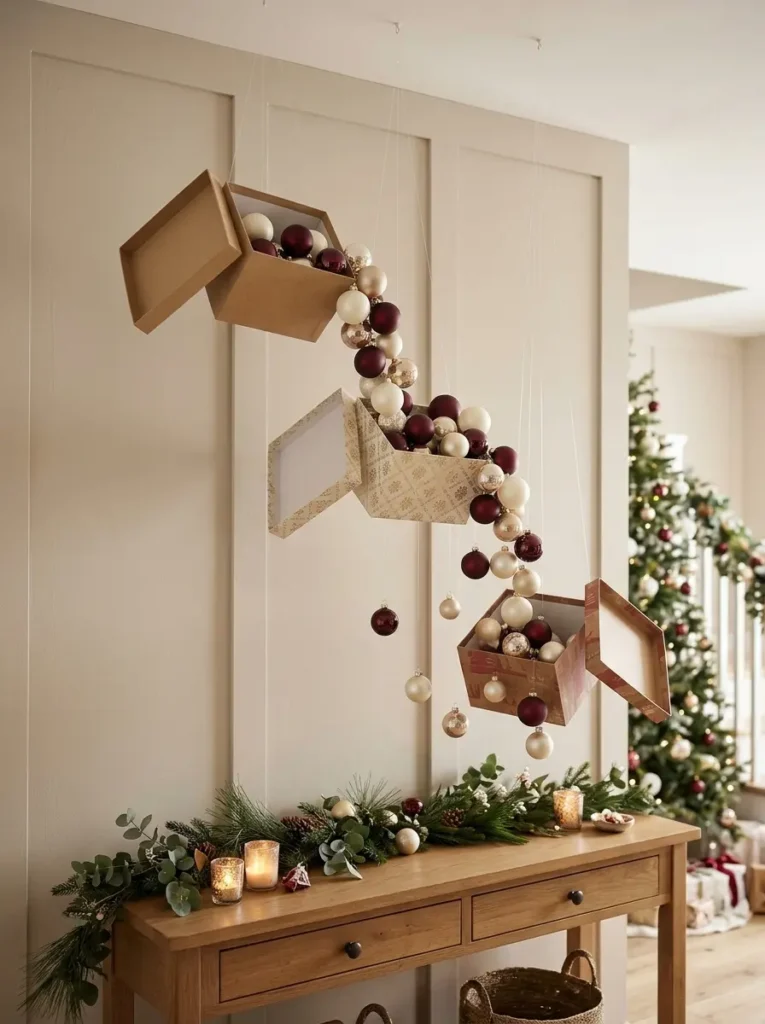
- Best for: above a console or entry table | Drop: stepped, 14-30 in | Time: 1 hour | Level: medium
Three lightweight, open gift boxes at stepped heights, lids offset beside them, and a curved trail of burgundy, ivory and champagne baubles appearing to tumble from one box to the next. The story is Christmas morning, caught mid-spill. Hang every box on its own line.
Hallways and Entries (Ideas 5-8)
Hallways give you a long view and entries give you height. The rule for both: the passage stays completely clear, and the decoration rewards the walk through.
5. Float snowflakes and icicles under a warm-light canopy
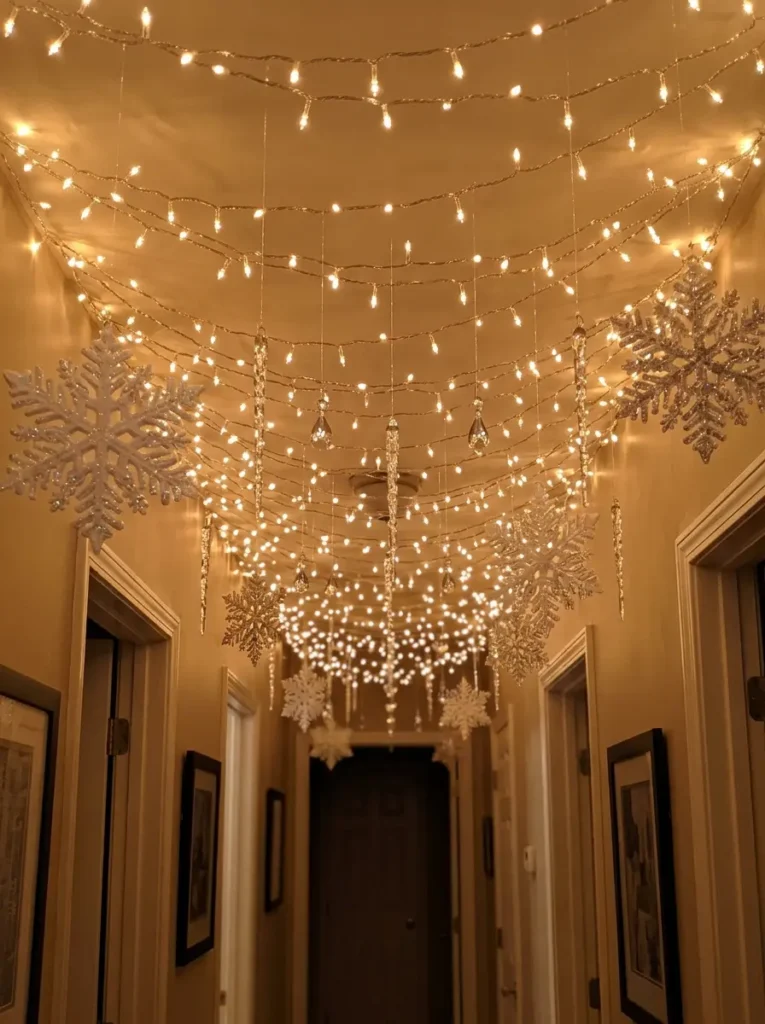
- Best for: hallway ceiling | Drop: 6-14 in only – keep it shallow | Time: 1 hour | Level: easy, needs many hooks
Mix broad snowflakes, slim icicles and small faceted drops in clear and white, and hang them at slightly different heights beneath a loose run of warm string lights. Put the largest flakes in the foreground and let finer drops continue down the hall – the shrinking scale makes the hallway feel longer.
6. Repeat garland-and-bauble rows along the hallway
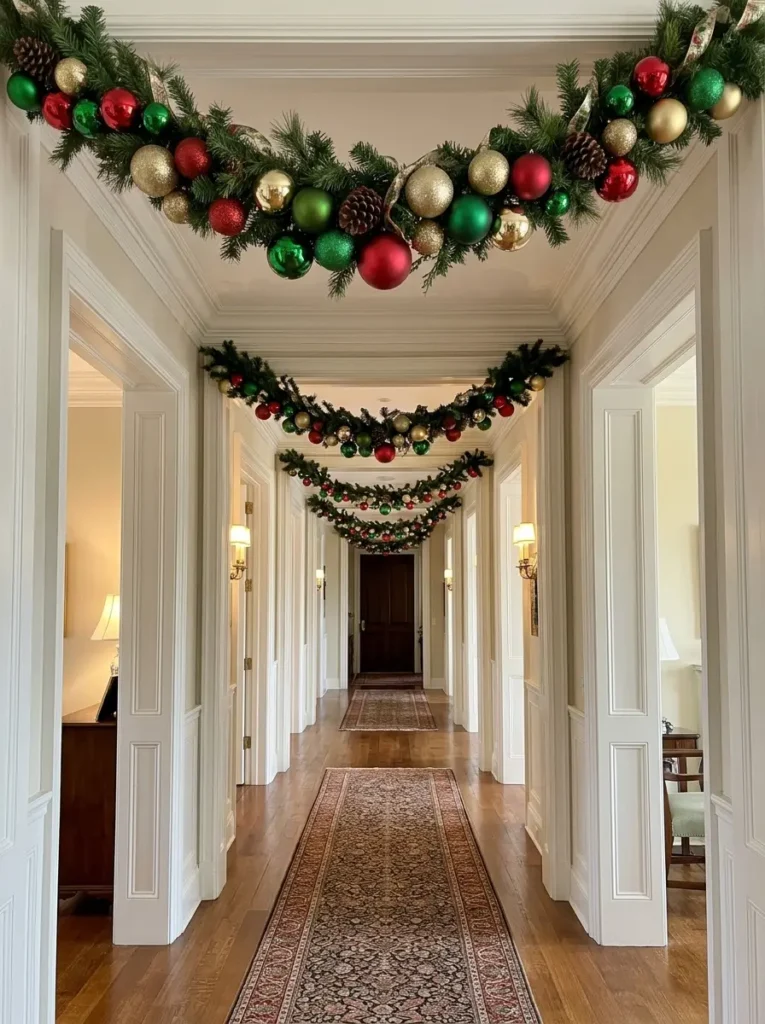
- Best for: long hallways, open-plan dividers | Drop: swags of 8-12 in | Time: 1-2 hours | Level: medium
Instead of inventing a new treatment at every doorway, repeat one: a shallow evergreen swag carrying a few red, green and gold baubles, again and again down the length of the ceiling. Let the first row carry the biggest ornaments, and make each following row a touch quieter.
7. Frame a room opening with gingerbread ornaments
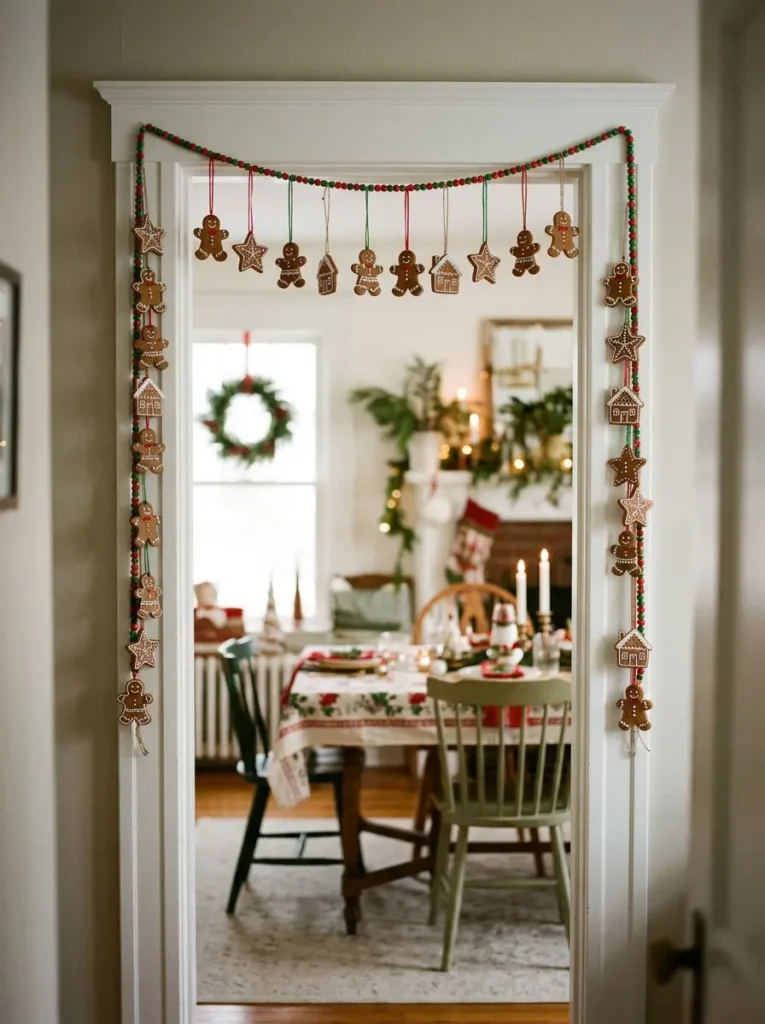
- Best for: kitchen or dining room doorway | Drop: short at center, longer at the sides | Time: 40 min | Level: easy
Gingerbread figures read clearly even from down the hall. Run a slim red-and-green bead garland along the top of the opening, hang the figures from it, and concentrate the longer drops at the sides so the center stays open and the decorated room beyond stays in the picture.
8. Suspend oversized velvet baubles with evergreen crowns
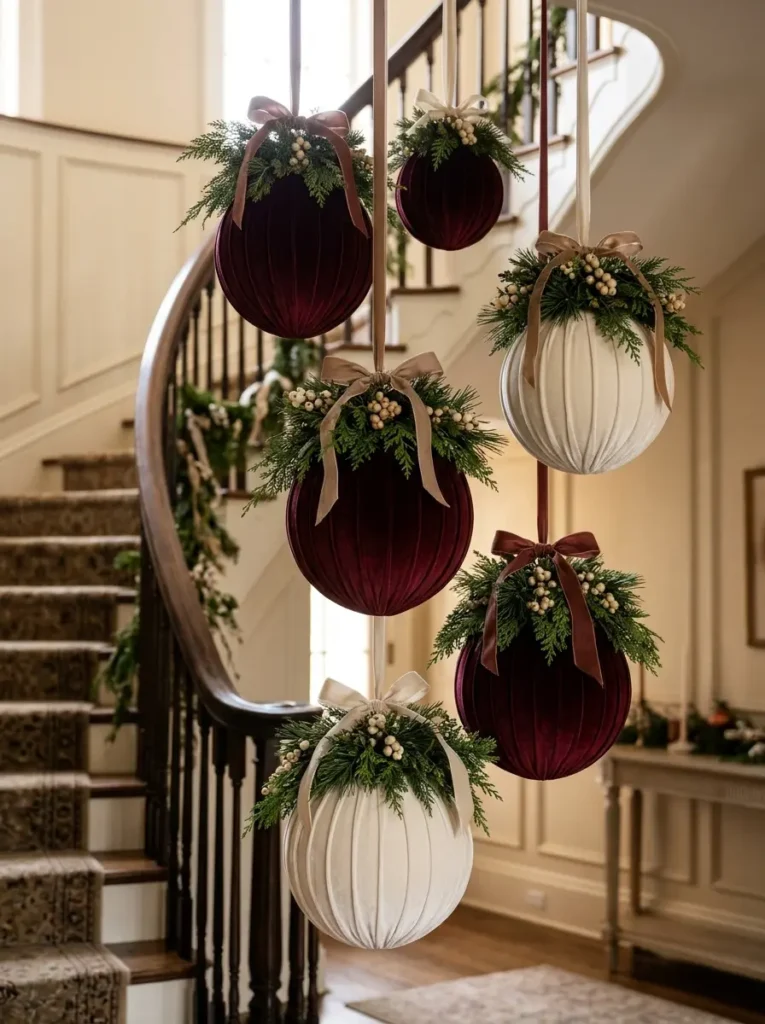
- Best for: stair hall, tall entry | Drop: 18-36 in, staggered | Time: 45 min | Level: easy
Velvet changes a big ornament completely: an ivory or burgundy sphere with soft ribbing looks upholstered, not shiny. Top each one with a compact crown of evergreen, pale berries and a relaxed bow, and stagger the group beside the sweep of a staircase.
Above Tables and Porches (Ideas 9-12)
Over a table, the silhouette is everything, because your guests will spend hours looking at it from one seat. Build these, then sit down and judge them from chair height – never from the ladder.
9. Layer crystal-drop hoops above the dining table
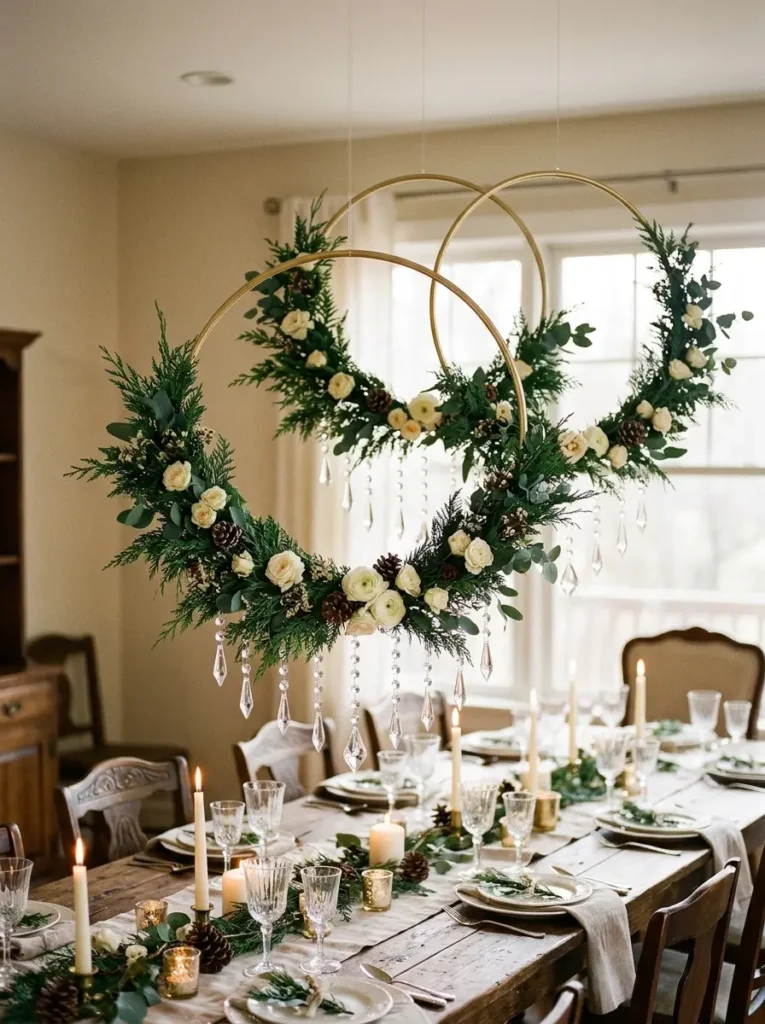
- Best for: dining table centerpiece | Bottom: 24-30 in above the table | Time: 1-2 hours | Level: medium
Two or three gold or evergreen hoops at offset heights, trimmed with greenery, ivory flowers and small pinecones, with faceted crystal-look drops hanging below in varied lengths. The empty center of each hoop gives a rich display somewhere to breathe and lets guests see through it.
10. Hang a mini Christmas tree canopy with stars and gifts
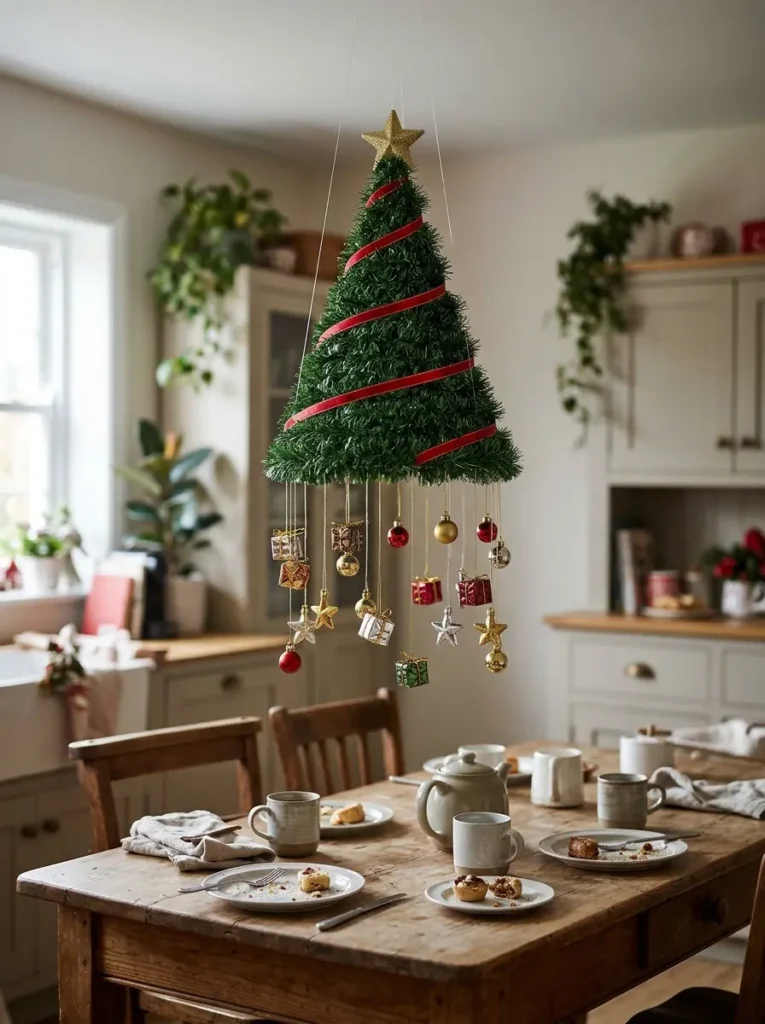
- Best for: breakfast or kitchen table | Bottom: 24 in above the table | Time: 1 hour | Level: medium
A small green cone – a mini tree shape – suspended above the table, wrapped with one narrow red ribbon and one gold star on top. Below its rim, hang miniature gifts, stars and baubles on unequal drops so the fringe feels lighter than the canopy above it.
11. Turn clear umbrellas into glowing ornament chandeliers
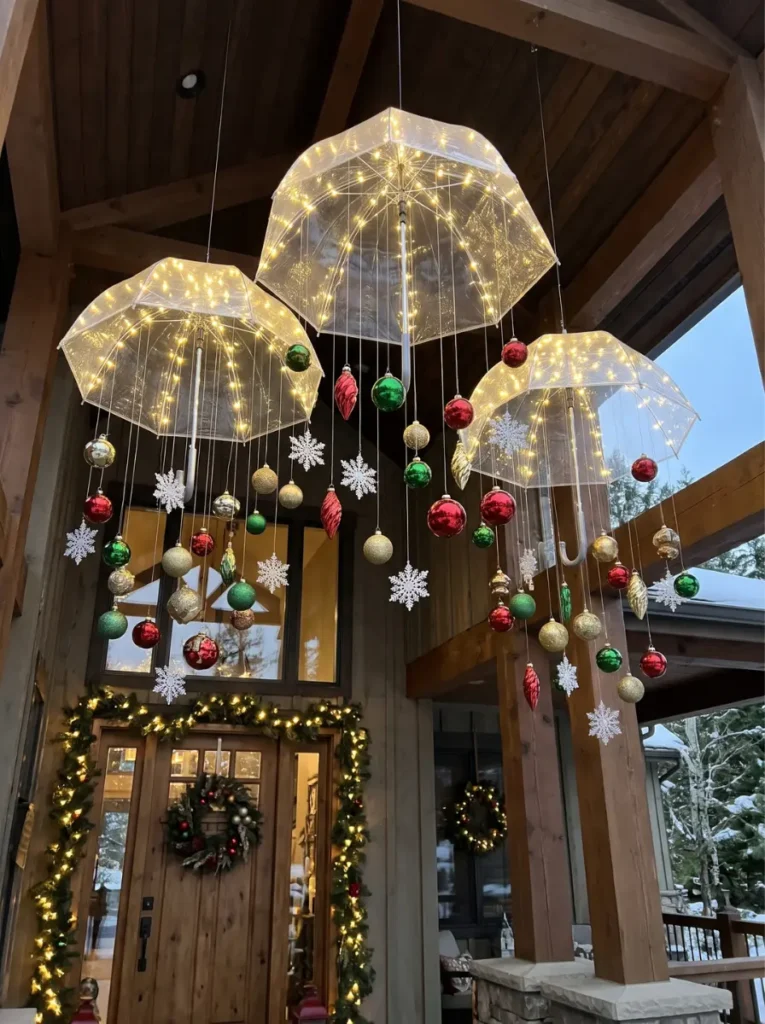
- Best for: covered porch, tall entry | Drop: high – this is a tall-space piece | Time: 1-2 hours | Level: medium
Two or three clear umbrellas, opened and hung dome-up, with warm battery lights following the ribs and red, green and gold ornaments dangling below at different levels, broken up by white snowflakes. The transparent dome keeps a generous display from becoming a solid block.
12. Dress the chandelier you already own
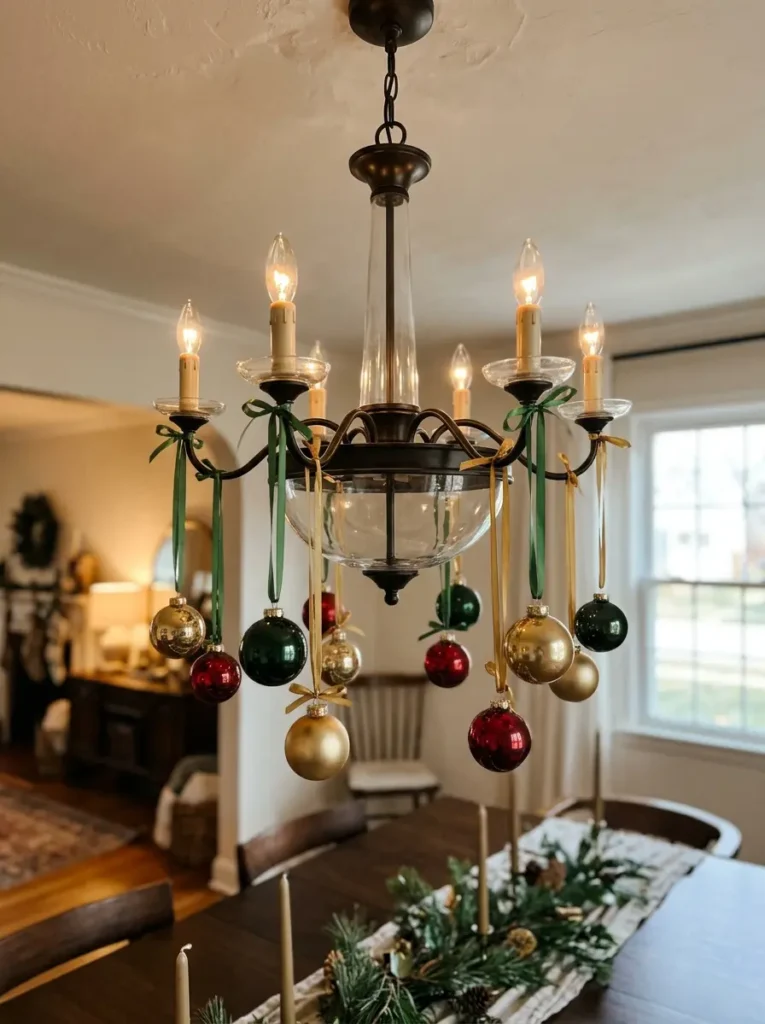
- Best for: any dining room, zero new hardware | Drop: ornaments just below the fixture | Time: 20 min | Level: easiest
The fastest display in this guide: tie 12 to 20 lightweight ornaments to the arms and frame of your existing chandelier on green or gold ribbon, at two or three lengths. - Pro tip: this is the test run. If you love living with ornaments overhead, graduate to idea 9.
Candy, Characters and Christmas Stories (Ideas 13-16)
Story displays live or die on one rule: the main shape – a swirl, a spiral, a sleigh – must stay readable. Small details are seasoning, never the meal.
13. Hang a candy-shop curtain beneath a beam
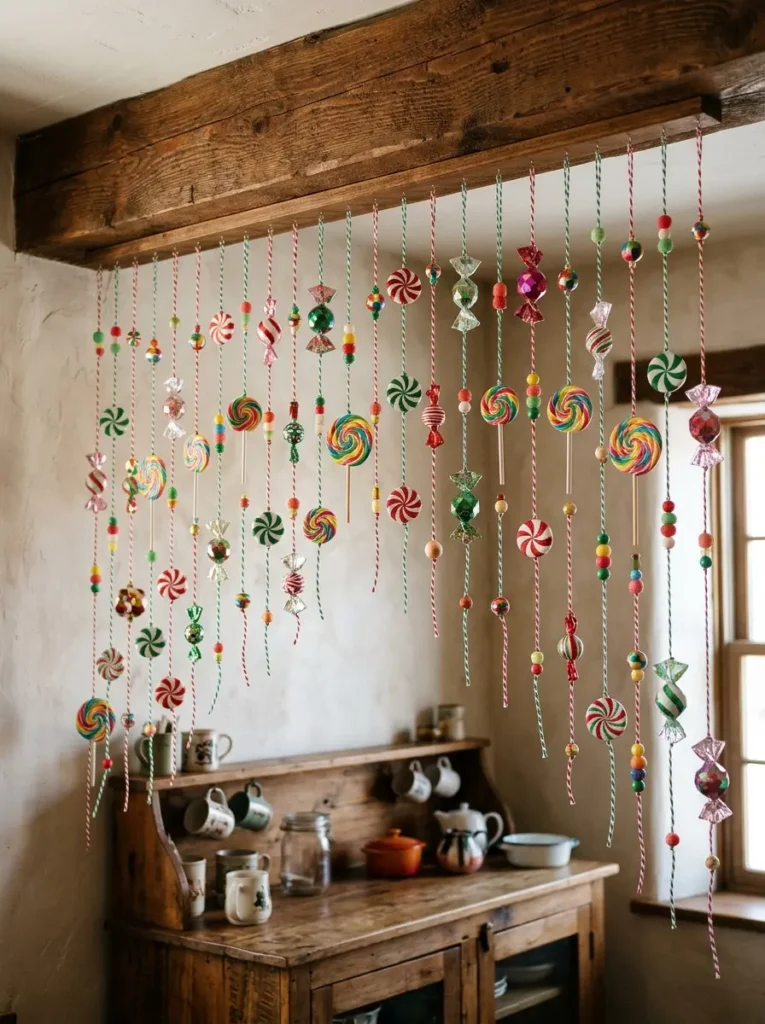
- Best for: kitchen beam, counter or side console | Drop: 12-28 in, uneven ends | Time: 1 hour | Level: easy
Peppermint swirls big enough to organize a whole curtain, on red-and-white and green-and-white string. Give every shape a job: large lollipops are landmarks, faceted wrapped sweets add angles, tiny rounds separate the strong patterns. Keep away from cooking heat and toddlers’ reach.
14. Hang a wreath-topped spiral of gingerbread and candy
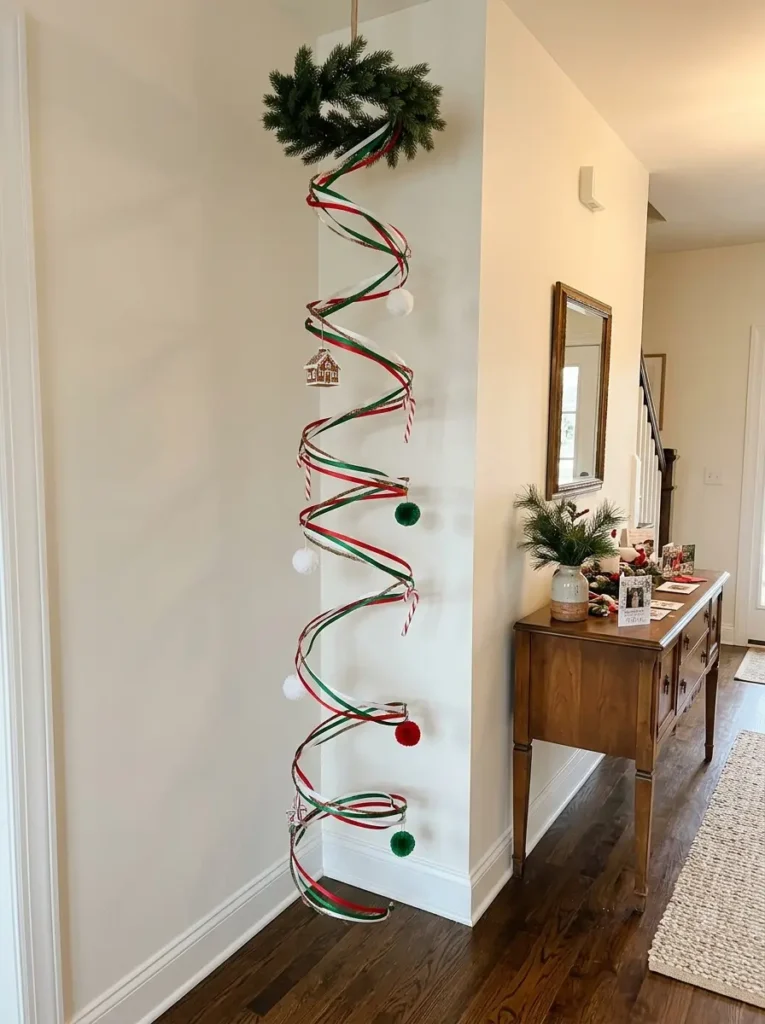
- Best for: hallway corner beside a console | Drop: the full spiral | Time: 1 hour | Level: medium
A continuous red, green and white spiral turning down from a small wreath, with a gingerbread house, a few candy canes and soft pom-poms spaced along the curve as moments to discover. Resist filling every gap – the empty turns are what make the spiral read.
15. Float a magical Santa sleigh in flight
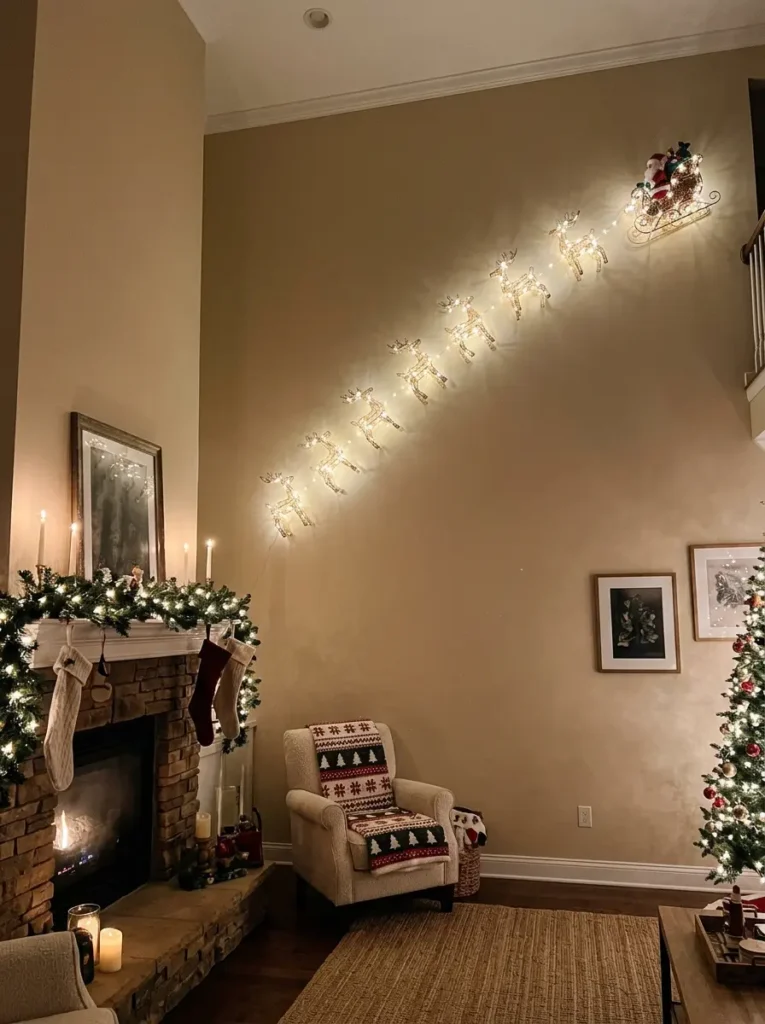
- Best for: living room ceiling edge, or the tall wall beside a mantel | Time: 45 min | Level: easy-medium
Lightweight reindeer spaced along one route in sequence, with Santa’s sleigh last. Keep clear gaps between figures so the flight path reads clearly from across the room.
16. Suspend an angelic star-waterfall display
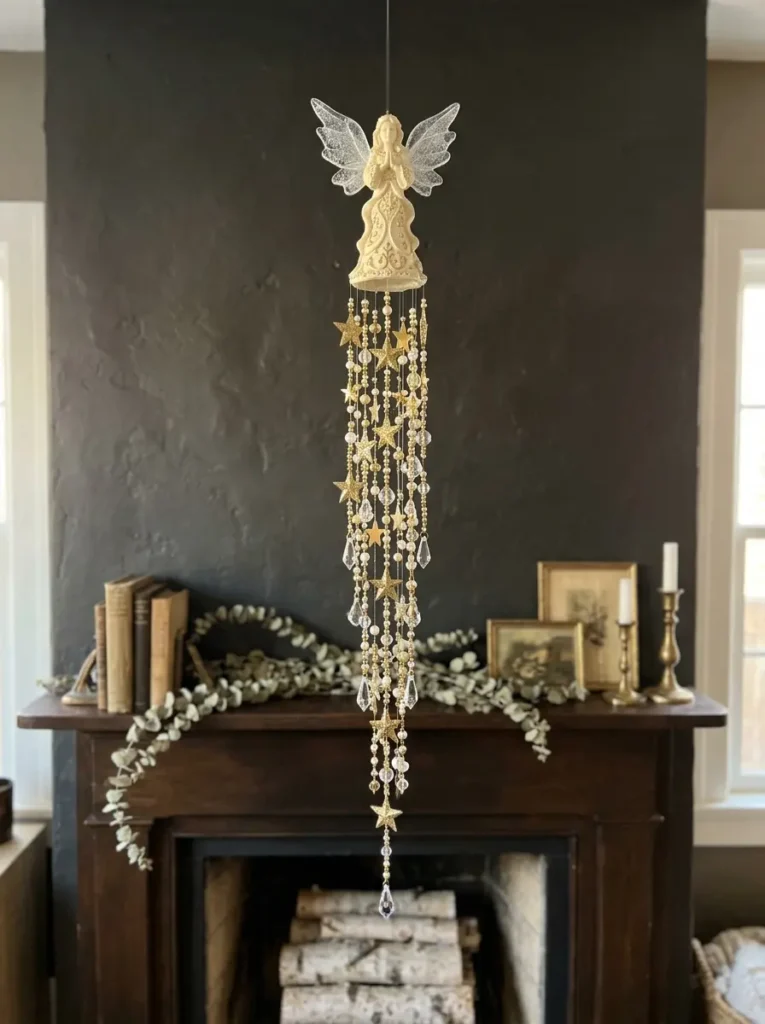
- Best for: above a mantel or reading nook | Time: 45 min | Level: easy-medium
One ivory angel with clear air around the wings, then a tapering trail of gold stars, beads and crystal drops falling beneath it. Keep it well away from any working fireplace.
Small Spaces and Rentals (Ideas 17-19)
Three displays the inspiration photos usually skip – built for low ceilings, small rooms and leases that say no holes. Each one goes up and comes down without touching the ceiling paint.
17. The five-strand entry cluster (adhesive hooks only)
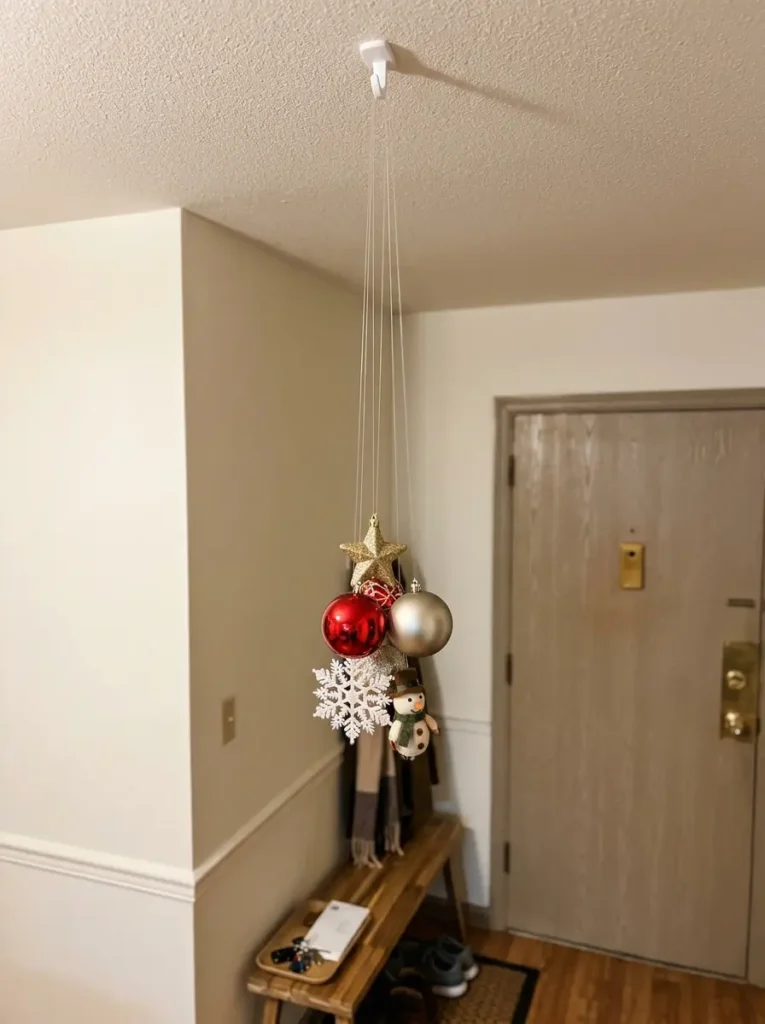
- Best for: apartment entry, rental hallway corner | Drop: 14-26 in | Time: 20 min | Level: easiest
One adhesive hook, five strands of fishing line, one ornament each: a star, two baubles in different finishes, a snowflake and one small character. Clustered tight over the spot beside the door, five strands look like a chandelier, not a compromise.
18. The doorway swag with hanging drops
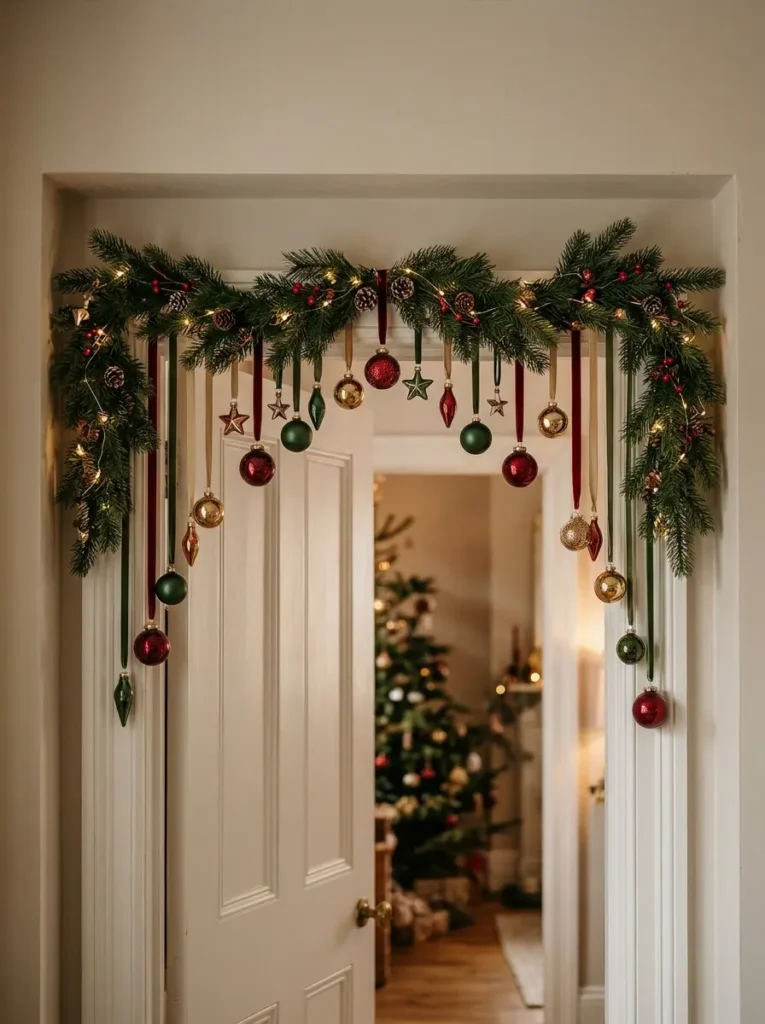
- Best for: any doorway, no ceiling contact at all | Time: 30 min | Level: easy
Pin or hook a short garland swag across the top of a door frame, then hang ornaments from the garland itself on short ribbons, longer at the sides, shortest in the middle. The frame carries the weight and the ceiling is never touched.
19. The bedroom canopy corner
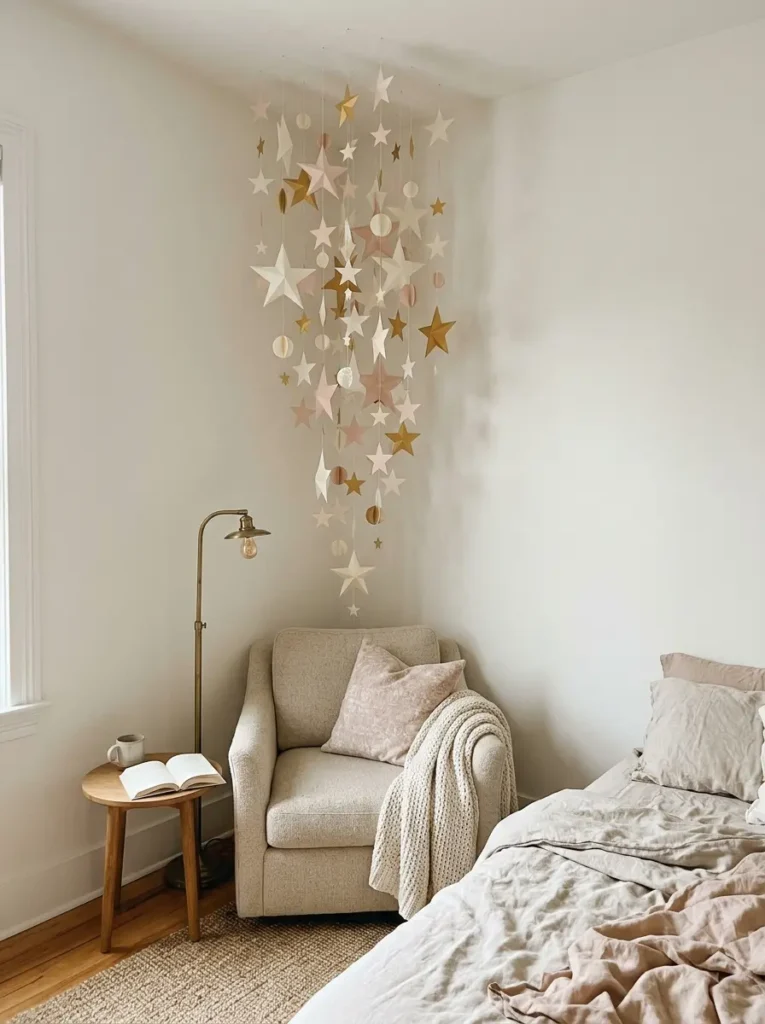
- Best for: bedroom or reading nook | Drop: long, into the corner only | Time: 30 min | Level: easy
Bedrooms suit the quiet version: matte ivory, blush and warm gold paper stars and lightweight baubles gathered into one corner above a reading chair, nothing over the bed itself. Warm, small-scale and calm.
7 Mistakes That Make Hanging Displays Look Cheap – or Fall Down
- Cutting every line the same length. Even rows look like retail. Vary drops by 2 to 6 inches.
- Using one finish everywhere. All-shiny or all-matte goes flat. Mix matte, shiny and one textured finish in every group.
- Hanging glass where people walk. Shatterproof overhead, glass only high and out of reach.
- Trusting one hook with a whole branch. Spread group weight across two or more supports, into joists where possible.
- Forgetting the seated view. A display judged only from a ladder will block faces at the table.
- Spreading a small budget across the whole ceiling. One dense, finished cluster beats ten lonely ornaments every time.
- Leaving it swinging. Clicking, tangling ornaments in a drafty hallway read as messy within a day. Secure the swing.
What It Costs: Three Budgets, One Shopping List
Typical US prices vary by store and season, but the tiers below are realistic for a single display:
- Starter (~$15–$30): A 24-50 pack of shatterproof baubles, fishing line or ribbon, adhesive hooks. Builds ideas 2, 12, 17 or 18 in full.
- Classic (~$35–$75): Starter kit plus a branch, dowel or hoop, faux greenery, one statement set and battery fairy lights. Builds most ideas in this guide.
- Statement (~$90–$180): Classic kit plus oversized ornaments, a second statement set and layered lighting. Builds ideas 9, 11 or a full hallway canopy.
The shop-once checklist
- Shatterproof ornaments in 2-3 sizes and 3 finishes (matte, shiny, textured)
- Clear fishing line (monofilament) and one spool of thin ribbon in your accent color
- Hooks matched to your method: adhesive ceiling hooks, or screw-in cup hooks
- One structure if your idea needs it: branch, wooden dowel, hoop, or tension rod
- Faux greenery, and battery fairy lights if the display glows
- Painter’s tape for marking, removable putty for steadying, a step ladder you trust
The Short Version
Pick one spot. Respect the clearances – 7 feet in walkways, 24 to 30 inches over the table. Choose the hook for the full weight, cut your lines uneven, hang large to small, and judge the result sitting down. That is the entire system; the 19 ideas are just 19 ways to dress it. A woodland branch for the window, snowflakes for the hall, velvet for the stairs, or five simple strands by the door of a rental – the ceiling you already have is the only supply none of them can do without.