By:Wajahat
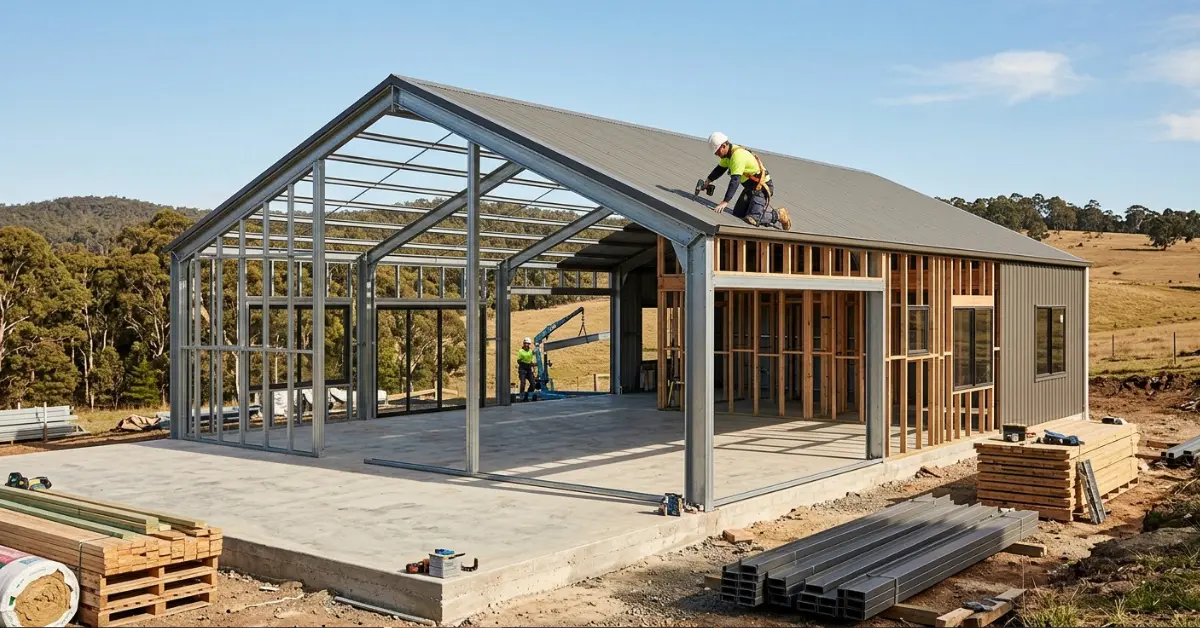
A Class 1A steel-frame DIY Barndominium Kits in Australia typically costs between $80,000 and $140,000 for the core lockup shell package. When managing the project as an owner-builder—taking the build from a bare concrete slab to a fully habitable residence—the completed total project cost ranges from $280,000 to $450,000+ (approx. $1,200 to $1,800/m²), delivering savings of 35% to 40% compared to standard residential construction.
Expert Insight:
The single biggest financial trap for owner-builders in Australia is treating a steel kit like an off-the-shelf garden shed. Under the National Construction Code (NCC), converting a steel structure into a livable home requires Class 1A engineering certification before concrete is poured. Designing your slab and portal frames for residential compliance from day one avoids costly structural retrofits or rejected council permits later.
Complete Financial Blueprint: Shell to Fully Finished
Building a barn-style residence requires balancing raw material kit packages, structural foundations, core trades, and internal timber joinery. The exact breakdown below outlines realistic owner-builder costs for a standard 200 m² open-span residence (e.g., a popular 40×60 ft or ~12×18 m floor plan).
| Project Stage | Inclusions & Key Deliverables | Estimated Cost Range (AUD) |
| Site Prep & Foundation | Soil testing, excavation, plumbing rough-in, engineered Class 1A concrete slab | $35,000 – $60,000 |
| Steel Kit Shell Package | BlueScope TRUECORE® steel frame, COLORBOND® roof/cladding, hardware, windows/doors | $82,000 – $135,000 |
| Trade Approvals & Utilities | Electrical mains connection, licensed plumbing, septic/sewer, council permits | $25,000 – $45,000 |
| Insulation & Drywall | Earthwool batt/spray insulation, plasterboard, ceiling lining, fire-proofing | $18,000 – $32,000 |
| Internal Joinery & Finishes | Timber framing, flooring ideas, kitchen cabinetry, plasterwork | $45,000 – $85,000 |
| Fixings, Fixtures & Paint | Bathroom vanities, lighting, paint, doors, tiling, internal trim | $30,000 – $55,000 |
| Total Turnkey Owner-Build | Complete Livable Residence (200 m²) | $235,000 – $412,000 |
Phase-by-Phase Line-Item Expense Breakdown
Phase 1: Site Preparation, Engineering, and Concrete Works
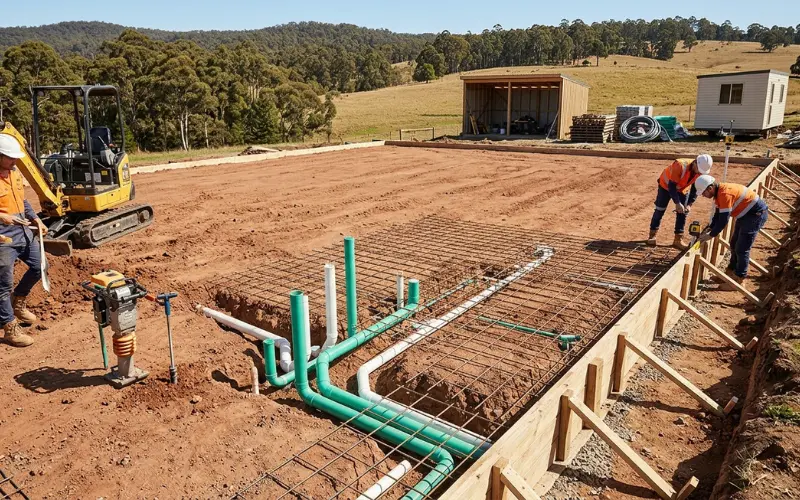
Before taking delivery of any steel components, your site must be engineered and leveled:
- Soil Testing and Geotechnical Reports: Site classification testing (Class S, M, H1, or H2) dictates foundation thickness and steel rebar density.
- Earthworks and Excavation: Earthmoving equipment hire and site leveling cost between $3,000 and $8,000 depending on sloped terrain or rock content.
- Under-Slab Rough-in: Licensed plumbers must install main waste drains and water inlets prior to pouring. Once the slab sets, core drilling or trenching through reinforced concrete adds thousands to your budget.
- Engineered Slab-on-Ground: A heavy-duty, engineered slab with edge thickenings designed to support clear-span steel portal columns costs roughly $150 to $220/m² installed.
Phase 2: Frame Erection and Weather-Tight Lockup
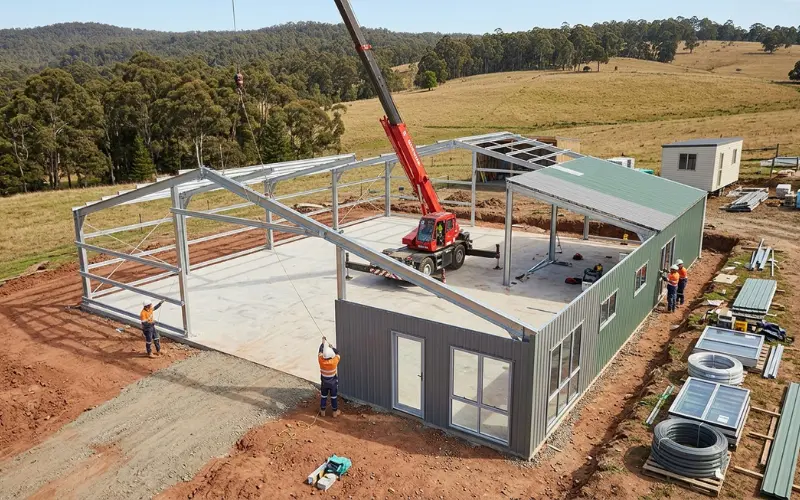
Erecting the primary structural shell represents the fastest transformation during construction:
- Frame and Truss Assembly: Clear-span portal frames bolt together using high-tensile galvanised steel hardware. Using an owner-builder team alongside a hired crane operator takes 3 to 7 days to erect the frame.
- Roofing and Cladding: Installing COLORBOND® sheeting, guttering, downpipes, and flashings creates a fully weatherproof envelope.
- Glazing and Entryways: Aluminum double-glazed windows and insulated exterior doors ensure compliance with mandatory NatHERS energy ratings across varied climate zones.
Phase 3: Mechanical Trades and Interior Rough-In
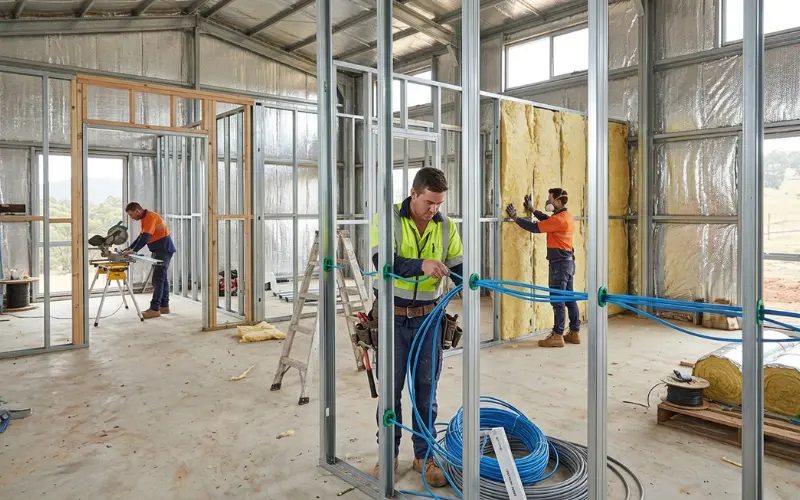
With the structure locked up, licensed trades handle the hidden mechanics:
- Electrical Pre-Wire: Pulling wiring through steel studs requires specialized grommets to prevent wire chafing. Sub-mains, switchboards, and power point positioning must be finalized now.
- Insulation Systems: Steel framing conducts heat faster than timber. A combined reflective foil bubble wrap (sarking) and minimum R2.5 to R4.0 bulk insulation batts are critical to control condensation and maintain thermal mass.
- Internal Sub-Framing: Non-structural internal partition walls are constructed using light-gauge steel or structural timber framing to divide living zones, bedrooms, and wet areas.
Phase 4: Fit-Out and Residential Finishing
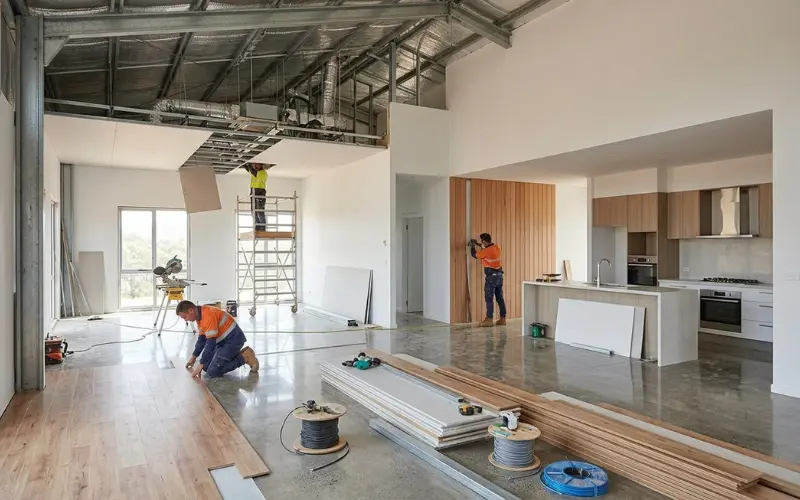
Transforming the interior void into a functional home involves structural joinery and finishing trades:
- Plasterboard and Wet Wall Substrates: Fiber-cement sheeting for bathrooms and moisture-resistant plasterboard throughout.
- Kitchen and Wet Area Fit-outs: Cabinetry, stone or timber benchtops, and kitchen appliances.
- Flooring and Decorative Accents: Polished concrete slabs cut costs significantly. Alternatively, installing floating timber, hybrid planks, or adding wall paneling creates a warm interior balance against steel walls.
Practical Construction Advice:
Steel portal frames feature zero internal load-bearing walls, giving you complete layout freedom. However, run all overhead air conditioning ducts, plumbing drops, and electrical lines before installing interior ceiling sheets. Retrofitting services above tall cathedral ceilings or inside tight roof trusses requires extra scaffolding and labor.
Critical Hidden Costs That Inflate Owner-Build Budgets
Budget overruns occur when owner-builders fail to calculate region-specific site requirements. Factoring these three structural and regulatory elements into your initial budget avoids financial strain midway through the project:
1. Wind Region and Bushfire Attack Level (BAL) Upgrades
In coastal or rural zones, engineered steel thicknesses must match local conditions:
- Cyclonic Regions: Severe wind ratings (Region C or D) require thicker gauge steel portal legs, closer purlin spacing, and heavy-duty tie-down brackets.
- Bushfire Zones: Building in BAL-12.5 up to BAL-40 areas demands non-combustible ember screening, toughened safety glass, specialized metal flashing seals, and spark proofing along all ridge caps.
2. Transport, Craneage, and Site Access Logistics
Delivering 12-meter steel portal beams to rural properties requires articulated transport trucks. If site access features narrow farm gates, soft soil, or low-hanging trees, transport operators charge extra for smaller shuttle loads. Additionally, raising heavy portal frames requires hiring a mobile crane with a licensed rigging operator for 1 to 2 days.
3. Thermal Performance and Condensation Mitigation
Steel framing is a strong thermal conductor. Without an unbroken thermal break between the external metal cladding and internal steel studs, moisture condenses inside wall cavities. This leads to frame rust and mold development behind plasterboard. Installing high-density thermal break strips and vapour-permeable membranes adds minor upfront costs but prevents structural decay.
Strategic Cost-Saving Blueprint for Owner-Builders
To achieve the best return on investment while completing a DIY kit home, strategic decisions should be focused on key high-impact areas:
- Optimize Floor Plan Geometry: Simple rectangular structures with standard 12 m or 15 m widths maximize material efficiency, minimize waste cuts, and lower primary steel engineering costs.
- Retain Slabs as Finished Flooring: Polishing the structural concrete foundation creates a modern, durable surface while eliminating carpet or floor tile supply costs.
- Focus DIY Labor on Non-Licensed Tasks: Save licensed trade rates by personally taking on wall insulation installation, plaster painting, interior door hanging, tile sealing, cabinet assembly, and site cleanup.
- Source Quality Kit Alternatives: For smaller secondary dwellings or simpler structures on your acreage, compare multi-room layouts against modular a frame house kits or dedicated diy cabin kits to find the best match for your site topology.
FAQ’s on DIY Barndominium Kits
Can I legally assemble a DIY barndominium kit without a builder license?
Yes, in most Australian states, you can erect and fit out a barndominium kit as an owner-builder. You must complete an owner-builder permit course and secure council approval. Licensed trades are still legally required to handle all main electrical wiring, internal plumbing, gasfitting, and waterproofing.
What is the difference between a Class 1A residence and a Class 10A shed?
A Class 10A structure is a non-habitable shed designed solely for storage, garaging, or farm equipment. A Class 1A dwelling is an engineered, legally habitable residence featuring strict thermal insulation, termite protection, ceiling height compliance, natural lighting, waterproofing, and fire safety standards.
How do kit prices differ between steel and timber framing?
Steel frame kits (using BlueScope TRUECORE®) provide straight lines, high strength-to-weight ratios, termite resistance, and non-combustibility. Timber framing is generally easier for traditional hand tools during internal partition building, but steel kits assemble faster for large, clear-span primary structures.
Do barndominium kits include internal walls and doors?
Most base kit supply packages include only the exterior shell: structural steel portal frames, COLORBOND® wall cladding, roof sheeting, gutters, flashings, structural fasteners, and exterior window openings. Internal partition walls, timber studs, interior doors, and fit-out joinery are purchased separately during the interior layout phase.
How thick should a concrete slab be for a steel barndominium?
A residential Class 1A concrete slab typically requires a minimum thickness of 100 mm reinforced with steel mesh, featuring deeper concrete footings (often 300 mm to 500+ mm wide) beneath the primary steel portal columns to transfer structural wind and live loads safely into the ground.
How long does it take to complete a DIY barndominium from start to finish?
Once council permits are approved and site earthworks are complete, erecting the steel kit shell to lockup stage usually takes 2 to 4 weeks. Completing all internal framing, electrical, plumbing, plasterboard, and interior fit-outs as an owner-builder takes 4 to 9 months depending on trade availability and dedicated labor.
Can I build a barndominium in a bushfire-prone area?
Yes, steel barndominiums perform well in bushfire-prone zones because steel is non-combustible. However, depending on your assigned Bushfire Attack Level (BAL) rating, you must install specialized ember mesh, toughened window glass, weatherboard/metal seals, and flame-resistant insulation.