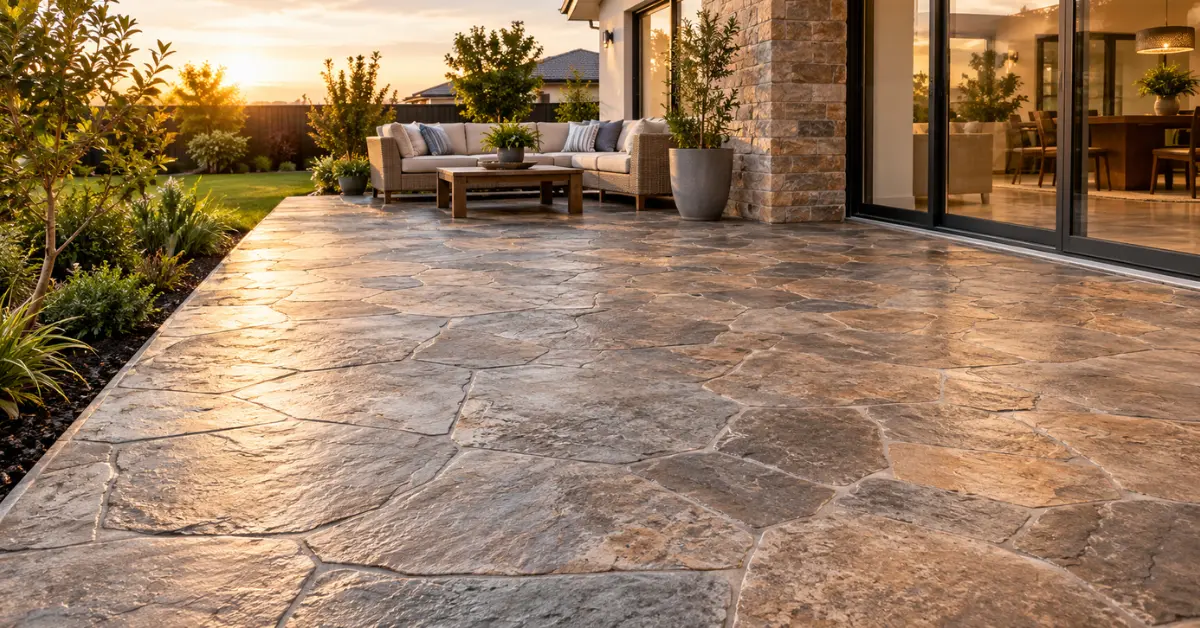
Most stamped concrete patios look fake for the same reason: the surface is uniform. Real stone varies in colour, texture, edge depth and joint width from one piece to the next, so a convincing result comes from copying that variation with layered colour, hand-finished joints and the right sealer.
To make a stamped concrete patio look like real stone, choose a large-format pattern such as ashlar slate or random flagstone, use two or three colour tones instead of one, hand-tool the joints, and finish with a matte sealer. Skip the glossy finish. It is the quickest giveaway.
Why Stamped Patios Often Look Fake
I have seen plenty of patios where the pattern was fine and the finish let it down. Three problems show up again and again.
- One flat colour across the whole slab. Natural stone never has this.
- Repeating stamp impressions. If your eye catches the same crack or ripple every 1.2 metres, the illusion is gone.
- Shiny sealer. High gloss reads as plastic, particularly under Australian sun.
Fixing these three things does more than upgrading to an expensive pattern ever will.
Choose a Stone Pattern That Suits Your Home
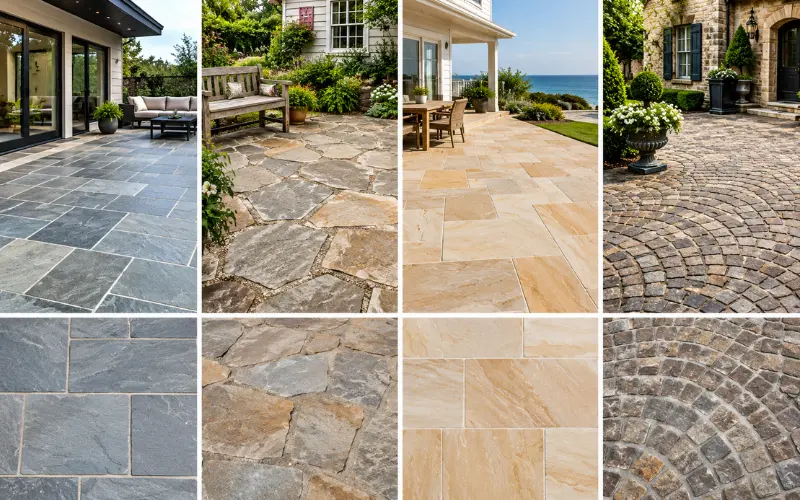
Not every stone look suits every house, and matching the pattern to your architecture matters more than people think.
- Ashlar slate: Rectangular pieces in mixed sizes. It suits contemporary and Hamptons-style homes.
- Random flagstone: Irregular shapes with wider joints. Good for cottage gardens and rustic settings.
- Sandstone or limestone block: Soft, subtle texture. It works well in coastal areas and warm-toned homes.
- Cobblestone and European fan: More traditional, and better suited to heritage homes and courtyards.
Large stones usually look more natural than small ones because there are fewer joints to repeat. If you are planning the patio as part of a wider modern alfresco space, keep the stone scale in proportion to the area. Oversized flagstone in a tiny courtyard looks forced.
From my experience: Ask your contractor for at least three different stamp mats in the same pattern family. Rotating and swapping mats as the concrete is stamped is the cheapest way to avoid obvious repetition.
Build Colour in Layers
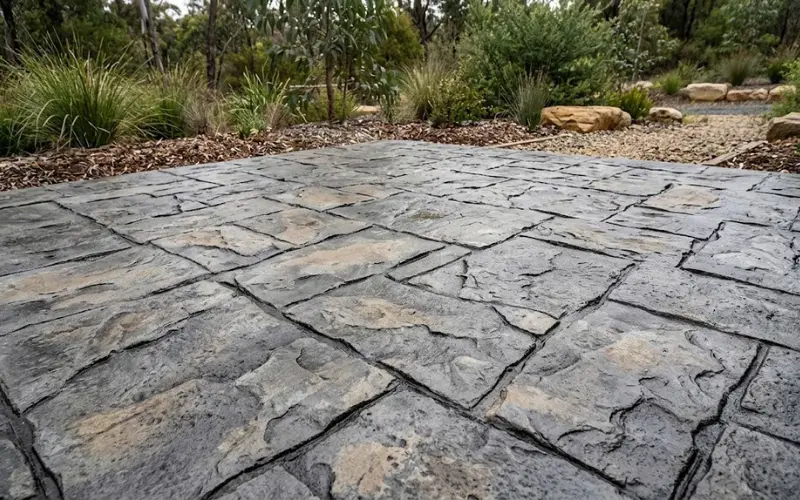
This is where most of the realism comes from. Real stone has depth, and a single colour pour cannot give you that.
- Base colour: Use integral colour mixed through the concrete, or a dry-shake colour hardener broadcast over the surface. Pick a mid-tone, not the final shade.
- Accent colour: Apply a second tone in patches using the dry-shake method, or with a diluted acid stain once cured. Keep it uneven.
- Release agent: This powder stops the stamp mats sticking and also leaves a contrasting tone in the texture. Charcoal or antique grey over a lighter base creates natural-looking shadow in the grooves.
- Colour wash or tint: A thin water-based stain applied after curing can blend everything together and add variation between individual stones.
For an Australian look, bluestone greys, warm sandstone and charcoal slate tones work best. Avoid terracotta orange unless you want a Mediterranean feel, because it tends to read as artificial in a bushland or coastal garden.
Hand-Tool the Joints and Edges
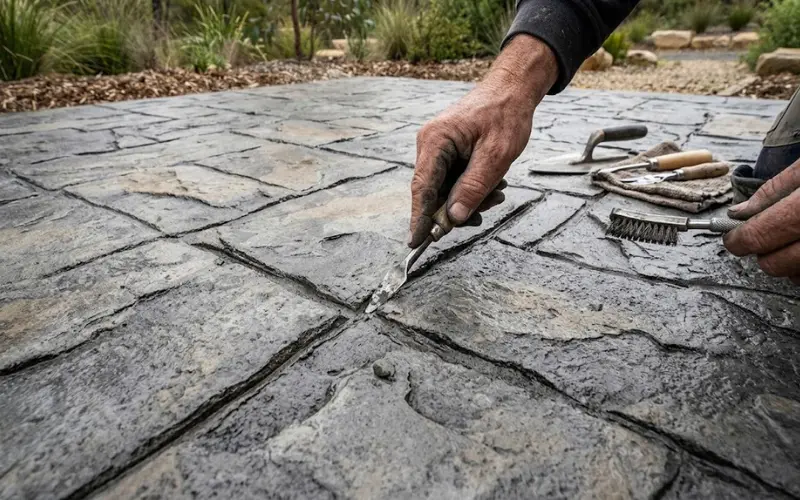
Stamps leave a clean, mechanical joint. Real stone does not. After stamping, a skilled finisher goes back with hand tools to:
- Vary the joint width so some gaps are tight and others are wider.
- Add small chips and edge rounding to selected stones.
- Blend the seams where one stamp mat meets the next, which is where the repeat lines normally show.
This step costs extra labour but is the biggest difference between a good job and a budget job. When getting quotes, ask directly whether hand-tooling is included.
Plan Control Joints Along the Stone Lines
Stamped Concrete Patio cracks. That is not a flaw, it is how the material behaves as it cures and shrinks. The trick is to decide where it cracks.
Cutting control joints along the grout lines of the pattern hides them in plain sight. A straight saw cut across the middle of a stone is obvious. One that follows a joint disappears. Joints are usually spaced at roughly 2 to 3 metres in each direction, and your contractor should plan the stamping layout around them before the pour day.
Pick the Right Sealer
Sealer decides how the patio looks for years, so it deserves more thought than it normally gets.
| Sealer type | Finish | Best for | Watch out for |
|---|---|---|---|
| Water-based acrylic (matte) | Natural, low sheen | Most residential patios | Needs resealing every 2 to 3 years |
| Solvent-based acrylic | Richer, wet-look colour | Shaded areas, deeper colour | Can look glossy, stronger fumes |
| Penetrating sealer | No film, very natural | Maximum stone realism | Less colour enhancement |
For a stone look, I lean towards a matte water-based product or a penetrating sealer. If the patio is exposed to full sun, check the UV stability of the product, because cheap sealers yellow and haze.
Safety and Slip Resistance
This is something most competitor guides skip entirely. Smooth stamped concrete can get slippery when wet, especially near pools, under downpipes or on shaded southern sides where moss grows.
- Ask for an anti-slip additive mixed into the sealer. It is fine grit that you will barely notice.
- Choose a textured stamp skin rather than a smooth one.
- For pool surrounds, ask the installer about the slip-resistance rating they can achieve and confirm what your local requirements are.
Field note: Always test a small sample board with your chosen sealer and anti-slip additive before committing. Sealer can change the colour more than you expect, and a sample is far cheaper than a redo.
What a Stone-Look Patio Costs in Australia
Prices vary by city, access, slab thickness and design complexity, so treat these as indicative only. Stamped concrete typically runs at roughly $90 to $150 per square metre installed, and more for multi-colour work with hand-tooling.
For a patio around 6 m x 6 m (36 m², close to a 20 x 20 foot slab), expect somewhere around $3,500 to $6,500. The upper end usually covers layered colour, hand-finished joints and a quality sealer, which is exactly what makes it look like stone.
Compared with natural stone or premium pavers, stamped concrete is often cheaper to lay, but it is not always the cheapest option over the long term. Resealing and potential crack repairs add ongoing cost, which brings me to the drawbacks.
Honest Drawbacks Before You Commit
- Cracking: Hairline cracks can appear even with good joint planning. They are cosmetic in most cases, but patching never matches perfectly.
- Maintenance: Expect to reseal every 2 to 3 years and clean regularly to prevent mould.
- Repairs: Colour matching an older patio is difficult.
- Heat: Dark colours get hot underfoot in summer. Lighter tones are more comfortable for bare feet.
If you want something with an easier long-term repair path, individual pavers might suit you better. If you want a seamless stone look without hundreds of joints to weed, stamped concrete wins.
Finishing Touches That Sell the Illusion
Real stone patios do not exist in isolation. Surround the slab with the same materials a stone patio would have.
- Plant low ground cover or ornamental grasses along the edges so they soften the border.
- Use a matching border or a soldier course around the perimeter.
- Combine the patio with timber elements and good lighting, as covered in these covered outdoor living space ideas.
- Link the patio visually with the rest of your outdoor space using a consistent palette, which is a principle explained well in this guide to outdoor living design.
If part of your garden also needs hard surfaces, a paved garden layout can help you decide where stamped concrete ends and other materials begin.
Quick Checklist Before You Hire a Contractor
- Ask to see completed jobs at least a year old, not just fresh photos.
- Confirm slab thickness (usually 100 mm) and the reinforcement used.
- Ask how many stamp mats they use and how they handle repeats.
- Get the sealer brand and finish in writing.
- Check whether council or body corporate approval is needed for your site.
FAQ on Stamped Concrete Patio
1. How long should I wait before walking on a new stamped concrete patio?
Light foot traffic is usually fine after about 24 to 48 hours, but wait around 7 days before placing furniture and 28 days before driving anything heavy over it.
2. Can I stamp over my existing concrete slab?
Yes, in some cases. A thin overlay can be stamped, but the old slab must be structurally sound and free of major cracks. Overlays tend to wear faster than a full pour.
3. Does Stamped Concrete Patio fade in the Australian sun?
It can, particularly with cheap sealers or surface-applied colour. UV-stable sealer and periodic resealing keep the colour looking fresh.
4. Is stamped concrete suitable around a pool?
It can be, as long as you use a textured pattern and an anti-slip sealer additive. Smooth finishes near water are a poor choice.
5. What is the best time of year to pour a Stamped Concrete Patio?
Mild, dry weather is ideal. Extreme heat makes the concrete set too quickly for stamping, and heavy rain can ruin the surface.
6. How do I clean moss and algae off Stamped Concrete Patio?
Use a soft broom and a mild detergent or a concrete-safe mould cleaner. Avoid high-pressure washing close to the surface, as it can strip the sealer.
7. Will a Stamped Concrete Patio add value to my home?
A well-finished patio improves outdoor appeal and usability, but poor quality work can have the opposite effect. Quality of installation matters more than the pattern.
8. Can I do this as a DIY project?
Small areas are possible, but stamping is time-critical and unforgiving. Most homeowners get better results by hiring an experienced finisher and handling the planting and styling themselves.