
A diy window tint kit for your home gives you everything needed to tint your own windows without hiring an installer, typically including precut or roll film sized to your window, a squeegee, application solution, and a trim knife. Quality varies a lot between a bargain roll and a proper kit with real tools, and that gap shows up fast on large picture windows or sliding glass doors. This guide covers what’s actually in these kits, how to pick the right film for your goals, and the mistakes that cause bubbling or peeling.
What’s Actually in a DIY Window Tint Kit (Beyond the Film)
Most first-time buyers assume the film is the hard part. It isn’t. The tools are what separate a clean, bubble-free install from a hazy mess you’ll want to redo.
A properly equipped window tint tool kit for home use should include:
- A hard card for pressing film flat against glass without scratching it
- A squeegee, ideally a soft one for initial application and a firmer one for pressing out water
- Application solution (often just water with a few drops of baby shampoo) so the film can slide into position before it sets
- A trim or utility knife for cutting film flush along the window frame
- A spray bottle for keeping the glass and film wet during positioning
- Lint-free cloths for final cleanup around the edges
Cheap kits often skip the second squeegee or hand you a flimsy card that flexes too much on a large pane. That’s fine on a small bathroom window. It becomes a real problem on a wide living room window, which is exactly where most home DIY jobs go wrong.
Precut vs Roll Film: Which DIY Window Tint Kit Fits Your Project
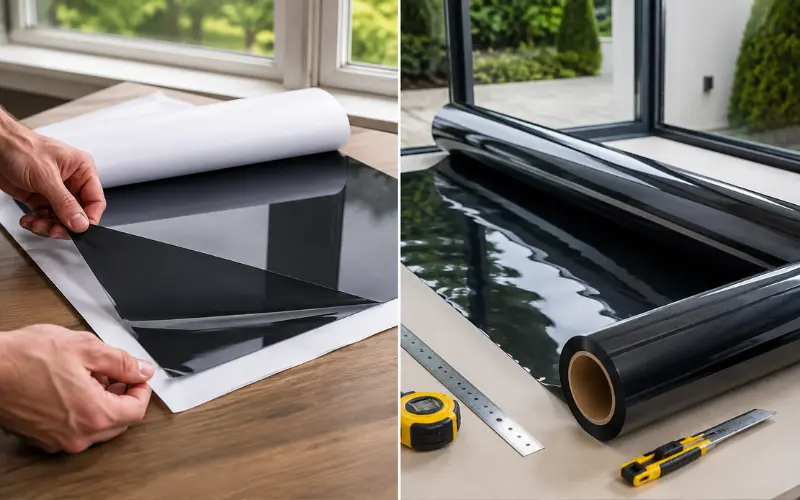
Precut DIY Window Tint Kit for home use is cut to a standard size or, with some sellers, to your exact window dimensions. Roll kits give you a large sheet of film you measure and cut yourself.
| Factor | Precut Kit | Roll Film Kit |
|---|---|---|
| Fit accuracy | Exact for the size ordered | Depends on your measuring and cutting |
| Waste | Minimal | Higher on a first attempt |
| Cost per window | Higher per pane | Lower per square foot overall |
| Best for | One or two windows, first-timers | Multiple windows, experienced installers |
| Odd-shaped windows | Limited to standard sizes | Fully customizable |
If you’re tinting one or two standard-sized windows and this is your first time, a precut kit removes the guesswork of measuring and squaring off cuts. If you’re doing a whole house or you have non-standard window shapes, a roll kit gives you the flexibility to cut exactly what each opening needs.
Where to Buy: What to Look For Beyond Price
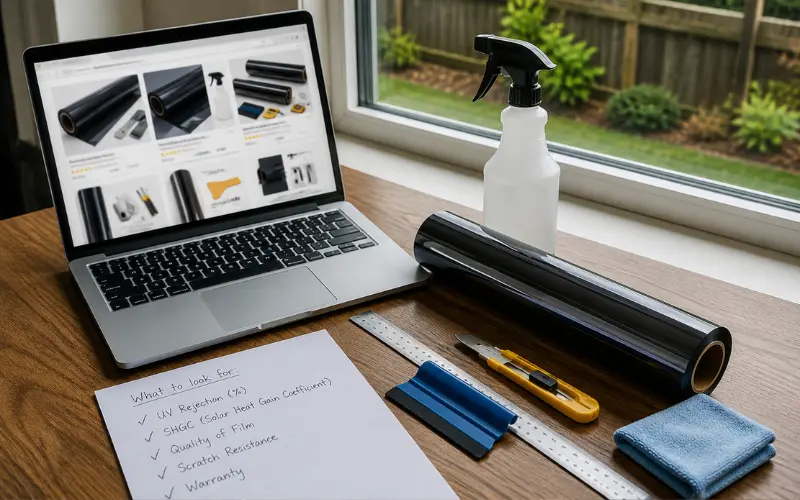
Basic home tint kits are widely available online, from $15 no-name rolls to branded kits with a real tool set included, and quality control varies a lot since many listings are sold by third-party sellers under the same product page.
Specialty window film retailers sell more complete kits aimed at serious DIYers, with better squeegees and application solution formulated specifically for larger panes. If you’re only tinting a window or two, the markup usually isn’t worth it. If you’re planning to cover most of the house, the better tools reduce redo rate enough to pay for themselves.
Two things matter more than the tool list when comparing kits: the UV rejection percentage and the solar heat gain coefficient (SHGC). These numbers tell you how much heat and UV the film actually blocks, and they’re often buried lower on the listing than the visible darkness percentage.
How Much a DIY Window Tint Kit Actually Costs vs Hiring an Installer
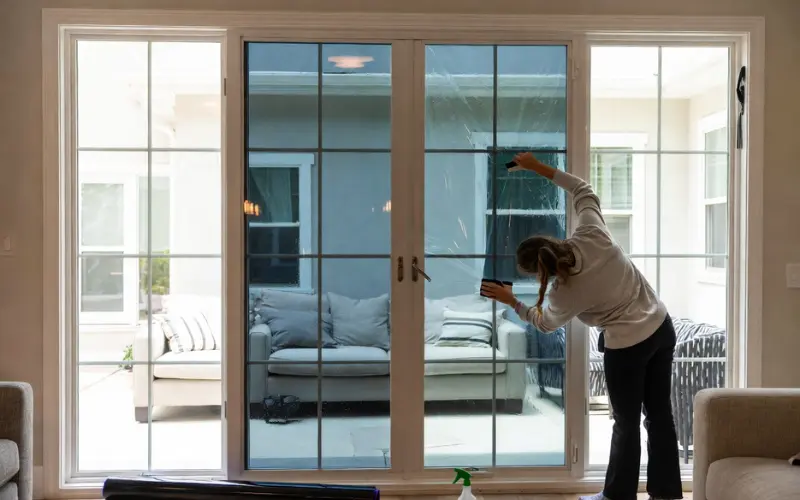
A full kit for an average-sized home, film plus tools, generally runs $80 to $250 depending on square footage and film quality (dyed, ceramic, or low-e). A professional installer charges $300 to $800 or more for a whole-house job, sometimes higher for premium ceramic film.
The math strongly favors DIY on price. What it doesn’t account for is redo cost on large panes. Bigger windows mean more surface area for dust or bubbles to get trapped, and a mistake on an 8-foot patio door wastes a lot more film than a mistake on a small bathroom window. If you’re not confident in your technique yet, start with a smaller or less visible window before tackling the living room or a sliding glass door.
Step-by-Step Nuances Most Guides Skip
The basic steps (clean, wet, apply, squeegee, trim) are on every kit’s instructions. What’s usually missing is the detail that actually determines whether it looks good in six months:
- Work in the shade, not direct sun. Direct sunlight dries the application solution too fast, leaving you no time to reposition the film before it grabs the glass.
- Squeegee from the center outward in overlapping strokes, not one long pass corner to corner. This is what actually pushes trapped water and air out from under the film rather than just moving it around.
- Leave the film slightly oversized, then trim last. Cutting to the exact window size before application almost always leaves a small gap once the film settles.
- Don’t rush the initial press. Let the film sit wet for a minute or two so it can be shifted into perfect alignment before you start squeegeeing in earnest.
Common Mistakes First-Timers Make
- Installing below 40°F or above 90°F. Film adhesive behaves badly at temperature extremes, aim for a room between 65 and 85°F.
- Skipping the dust check. Any speck trapped under film shows as a visible bump once it’s dry. Clean glass twice, once with a standard cleaner, once with the application solution itself.
- Cutting too tight against the frame. Leave roughly 1/8 inch of clearance so the film has room to settle without curling at the edge.
- Ignoring cure time. Fresh film looks hazy or shows small trapped water pockets for several days to two weeks depending on humidity. Don’t judge the final result, or clean the window, until it’s fully cured.
- Tinting a window with a manufacturer’s warranty on the glass itself. Some window and door warranties exclude coverage if aftermarket film is applied, worth checking before you commit a whole house.
Choosing Film Type for the Right Goal
Not all home tint is chosen for the same reason, and the right kit depends on what you’re actually trying to fix:
- Heat reduction: look for a low SHGC and mid-range VLT, common on south- and west-facing windows that get direct afternoon sun
- UV and fade protection: prioritize UV rejection percentage over darkness, since a nearly clear film can still block 99% of UV
- Privacy: frosted or lighter reflective films work well for street-facing or ground-floor windows without making a room feel dark
- Glare reduction for home offices or TVs: a light tint with anti-glare coating matters more here than heat rejection numbers
FAQ
Can I tint my own windows at home?
Yes, home window tinting is one of the more DIY-friendly film projects since most home windows are flat, unlike curved vehicle glass, making the film easier to apply and trim.
What is the best DIY Window Tint Kit for home windows?
The best kit for a first-timer is a precut or standard-size kit paired with a full tool set, including a proper squeegee and application solution rather than just a bottle of soapy water.
Is DIY Window Tint Kit worth it for a house?
It’s worth it for the cost savings, especially across multiple windows, but larger panes carry more risk of a visible mistake, so starting with a smaller window is a good way to build confidence first.
Can I DIY precut tint for oddly shaped or older home windows?
Precut kits work well for standard sizes, but older homes with non-standard dimensions usually do better with roll film you cut to fit exactly.
How long does DIY Window Tint Kit take to cure?
Most films need several days to two weeks to fully cure depending on humidity and temperature, during which light haze or small water pockets are normal and will clear on their own.
Does DIY Window Tint Kit affect my window’s warranty?
Some window and door manufacturers exclude coverage for glass that’s had aftermarket film applied, so it’s worth checking your warranty terms before tinting, especially on newer installations.
What tools do I need beyond what’s in a basic kit?
A spray bottle for extra application solution, painter’s tape to hold film steady while you work larger panes, and a second, firmer squeegee for the final water press.
Can I remove and reapply film if I mess up the first cut?
Film that hasn’t fully set can often be lifted and repositioned within the first few minutes, but once it’s trimmed to a specific window size it generally can’t be reused elsewhere.

