
A paved garden turns an awkward, muddy, or high-maintenance yard into a space you actually want to spend time in. It gives you a clean surface for furniture, a dry path after rain, and a backdrop that makes your plants look even better. But most articles on this topic stop at pretty photos. They rarely tell you what materials actually cost, how the base is built underneath, or how to stop your paving from looking tired after two winters.
This guide covers all of that. You will find design ideas, a full materials comparison, a real cost breakdown, installation basics, and a maintenance routine that keeps the finished space looking sharp for decades, not just for the first summer.
What Is a Paved Garden?
A paved garden is an outdoor space where hard surfaces such as stone, concrete, brick, or porcelain slabs replace some or all of the grass and bare soil. It is not the same as a plain patio. A well-designed layout usually mixes hard surfaces with planting beds, gravel strips, and lawn edges, so the paving supports the garden instead of replacing it entirely.
Homeowners choose this approach for practical reasons: less mowing, better drainage, and a surface that stays usable in wet weather. It also works well for anyone who wants a low-maintenance backyard without giving up the feel of a garden.
Why Choose a Paved Garden? The Real Benefits
Before picking materials, it helps to understand what you actually gain.
- Lower upkeep. No mowing, less weeding, and no muddy patches after rain.
- Better drainage. The right base and slope move water away from your house instead of pooling near the foundation.
- Longer usable season. Paving stays dry and firm underfoot even in spring and late autumn, when lawns turn soft.
- Higher home value. A tidy, well-built outdoor space is one of the features buyers notice first.
- Design flexibility. Patterns, colours, and finishes let you match almost any architectural style, from a cottage to a modern build.
A well-planned layout also reduces the pest and allergy issues that come with large lawns, since there is simply less grass and standing water to manage.
Choosing the Right Material for Your Paved Garden
This is where most guides get vague. Here is a straightforward comparison based on cost, durability, and upkeep, so you can match the material to your budget and climate.
| Material | Typical Cost (installed, per sq ft) | Lifespan | Maintenance Level |
|---|---|---|---|
| Concrete pavers | $10 to $20 | 25 to 35 years | Low to moderate |
| Natural stone (flagstone, slate) | $18 to $35 | 50+ years | Moderate |
| Clay brick | $12 to $22 | 25 to 50 years | Moderate |
| Porcelain slabs | $20 to $40 | 20 to 30 years | Low |
| Poured concrete | $8 to $15 | 20 to 30 years | Low |
| Gravel | $3 to $8 | 10 to 15 years (needs topping up) | High |
Natural stone gives the richest texture and holds up the longest, but it costs more and needs occasional resealing. Concrete pavers strike a good balance of price and durability, and damaged ones can be swapped out individually, which natural stone often cannot. Porcelain resists staining and fading better than almost anything else, making it a smart pick for sunny, exposed yards.
Planning Your Paved Garden Layout
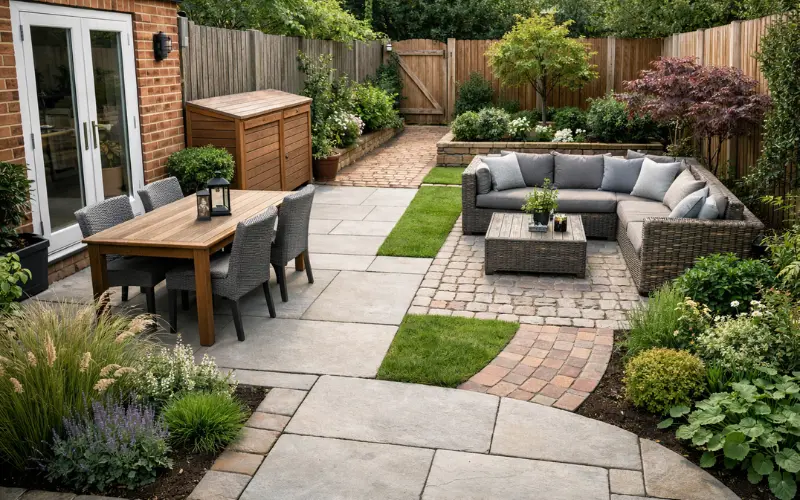
The layout works best when it is planned around how you actually use the space, not just how it looks in a photo.
- Map your traffic flow first. Note where people walk from the house to the garden, the bin store, and any gates. Paths should follow these natural routes, not force a detour.
- Zone the space. Separate dining, lounging, and planting areas with a change in material or a low border, rather than leaving one uniform slab.
- Check the slope. Paving should fall away from the house at a gentle grade, roughly a 1 to 2 percent slope, so rainwater drains safely instead of collecting against the wall.
- Leave room for planting. A yard with zero soil left feels sterile. Reserve borders or cut-outs for shrubs, climbers, or a small tree.
- Think about scale. Large slabs make a small garden feel more spacious, while smaller units like brick or cobble suit period homes and tighter courtyards.
Popular Paving Patterns Worth Considering
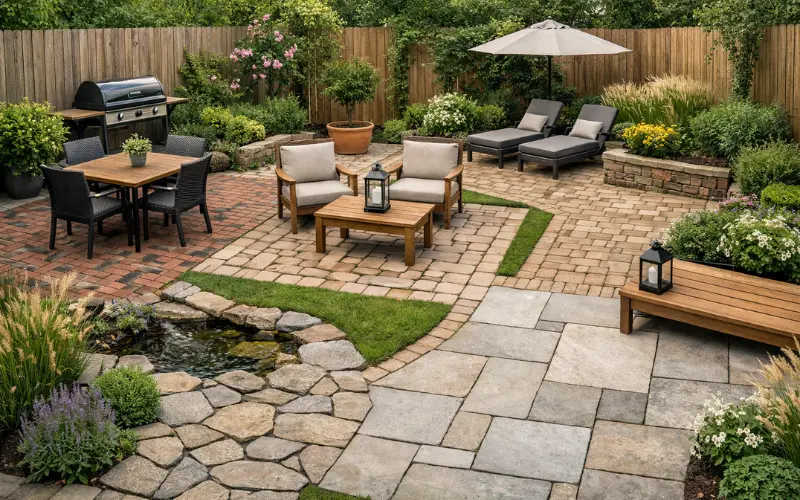
The layout pattern changes the character of the whole space more than most people expect.
- Herringbone: Interlocking pieces set at an angle. Strong, classic, and good for high-traffic areas.
- Stretcher bond (running bond): Rows offset like brickwork. Simple, tidy, and budget-friendly.
- Basketweave: Pairs of pavers set in alternating blocks. Suits informal, cottage-style gardens.
- Random or crazy paving: Irregular-shaped stone pieces fitted together. Gives a natural, rustic look.
- Large-format modular: Big rectangular slabs in a mixed-size layout. A favourite for contemporary designs.
Softening a Paved Garden with Planting
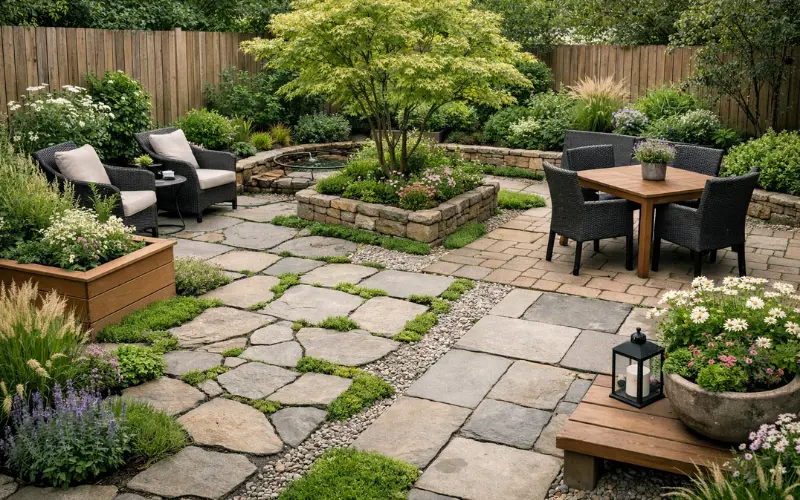
Hard surfaces alone can feel flat. The trick is to let planting break up the paving rather than compete with it.
- Leave gaps between stones for low, spreading plants such as creeping thyme or Irish moss.
- Use raised beds or large planters along the edges so greenery frames the space without taking up floor area.
- Add a single specimen tree or multi-stem shrub as a focal point; it softens hard lines instantly.
- Mix in gravel strips between paved sections to slow water runoff and create a natural transition to planting beds.
How Much Does a Paved Garden Cost?
Budget is usually the deciding factor, so here is a realistic view. For an average 300 square foot area, total installed cost including base preparation typically runs:
- Budget option (poured concrete or gravel): $2,400 to $4,500
- Mid-range (concrete pavers or brick): $3,600 to $6,600
- Premium (natural stone or porcelain): $6,000 to $12,000
Labour usually makes up 40 to 60 percent of the total, so DIY installation on a simple, flat layout can cut costs significantly. Complex patterns, steps, or drainage work are best left to a professional, since mistakes at this stage are expensive to fix later.
Getting the Base Right
This step decides whether your paving lasts twenty years or cracks within two. A proper base has three layers:
- Excavation: Dig out soil to a depth of 6 to 8 inches, depending on the material and local frost depth.
- Sub-base: Add a compacted layer of crushed stone or gravel, typically 4 to 6 inches, to support the load and allow drainage.
- Bedding layer: A thin layer of sharp sand or bedding sand, about 1 inch, gives the pavers a level, stable surface to sit on.
Skipping compaction is the single biggest reason paving sinks or shifts. Each layer should be compacted with a plate compactor before the next one goes down.
Keeping Your Paved Garden Looking Its Best
Maintenance is the part most articles leave out entirely, yet it is what keeps the surface looking new.
- Sweep and rinse monthly to stop dirt building up in the joints.
- Reapply joint sand every one to two years, since rain and foot traffic gradually wash it out.
- Seal natural stone or brick every two to three years to resist staining and frost damage.
- Remove moss and algae with a stiff brush and a diluted white vinegar solution rather than harsh chemicals, which can damage grout lines.
- Re-level sunken slabs as soon as you spot them, since a small dip gets worse quickly under regular foot traffic.
Common Mistakes to Avoid
- Choosing a material that turns slippery when wet, especially near pools or shaded areas.
- Skipping proper drainage planning, which leads to water pooling against the house.
- Paving edge to edge with no soil left for plants, which can also affect stormwater runoff rules in some areas.
- Ignoring the existing architecture, so the paving colour clashes with brickwork or siding.
- Underestimating base depth to save money, which almost always costs more in repairs later.
Eco-Friendly Paved Garden Ideas
Sustainability does not mean giving up on hard landscaping. Permeable pavers let rainwater filter through gaps into the ground instead of running into storm drains, which helps reduce flooding and recharges local groundwater. Choosing locally sourced stone cuts transport emissions, and leaving planting gaps between pavers supports pollinators even in a mostly hard-surfaced yard. Reclaimed brick or salvaged stone is another option worth considering if you want character with a lower environmental footprint.
Frequently Asked Questions
Is a paved garden a good investment?
Yes. A well-built layout reduces long-term maintenance costs and is consistently listed by real estate agents as a feature that improves curb appeal and resale value.
How long does a paved garden last?
Most materials last 20 to 50 years when the base is prepared correctly and basic maintenance is kept up. Natural stone tends to outlast concrete and gravel.
Can I install paving myself?
Simple, flat layouts with modular pavers are doable as a weekend DIY project. Complex patterns, slopes, or drainage systems are better handled by a licensed contractor.
Do I need planning permission for a paved garden?
This depends on your location and the total area being paved, especially where impermeable surfaces affect stormwater rules. Check with your local building department before starting.
What is the cheapest way to pave a garden?
Poured concrete or gravel are the most budget-friendly options, though gravel needs more frequent top-ups over time.
How do I stop weeds growing between pavers?
Use polymeric jointing sand, which hardens and resists weed growth, and reapply it every couple of years as it wears down.
Is permeable paving worth the extra cost?
In areas with heavy rainfall or strict drainage rules, yes. It reduces runoff, prevents pooling, and can lower the risk of water damage near your foundation.
Can paving be combined with a lawn?
Absolutely. Many of the best-designed gardens mix paved zones for seating and paths with smaller lawn areas or planting beds for a balanced look.
Final Thoughts
A paved garden done well brings together practicality and style: less maintenance, better drainage, and a space that works in every season. The key is treating it as a full project, not just a materials choice. Get the base right, plan your layout around how you actually live, leave room for planting, and keep up with simple maintenance. Do that, and the finished space will still look sharp long after the trend photos have faded.

