
Most DIY custom closet mistakes come down to skipping a real measurement plan, underestimating hardware weight limits, and building for the wardrobe you have today instead of the one you’ll have in five years. A well-planned custom closet costs less than half of a professionally installed one when you get the framing, spacing, and materials right the first time.
A DIY custom closet is one of the few home projects where a small planning error turns into a full teardown. Get the shelf height wrong and your sweaters won’t fit. Skimp on the rod bracket and your clothes end up on the floor within a month. This guide skips the basic “measure your closet” advice you’ve already read everywhere and goes straight into the specific mistakes that cost DIYers time, money, and drywall patches.
Mistake 1: Measuring the Walls but Ignoring the Obstacles
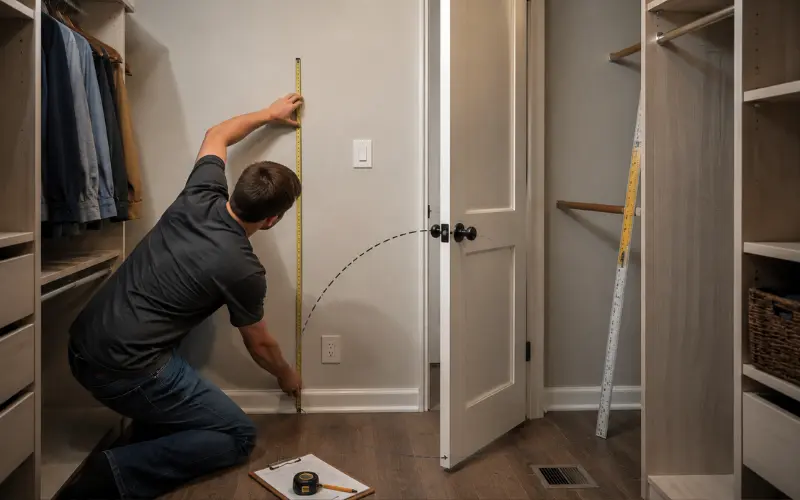
Most first-timers measure the back wall and two side walls, then start cutting. That’s not enough.
Baseboards, outlets, light switches, and door swing all eat into your usable space. A closet door that swings inward can clip a hanging rod if you don’t account for the arc. Recessed light fixtures and HVAC vents also dictate where you can and can’t run a top shelf.
Before you buy a single board:
- Note the exact location of any outlets or switches inside the closet.
- Measure the door swing radius, not just the door width.
- Check for sloped ceilings if the closet sits under stairs or a roofline. This is a common issue for anyone tackling under stair storage as a closet alternative.
- Confirm your baseboard height so shelf supports don’t sit on top of trim and throw off your levels.
Skipping this step is the single biggest reason DIYers end up re-drilling holes into finished walls.
Mistake 2: Choosing Hardware Based on Looks, Not Load
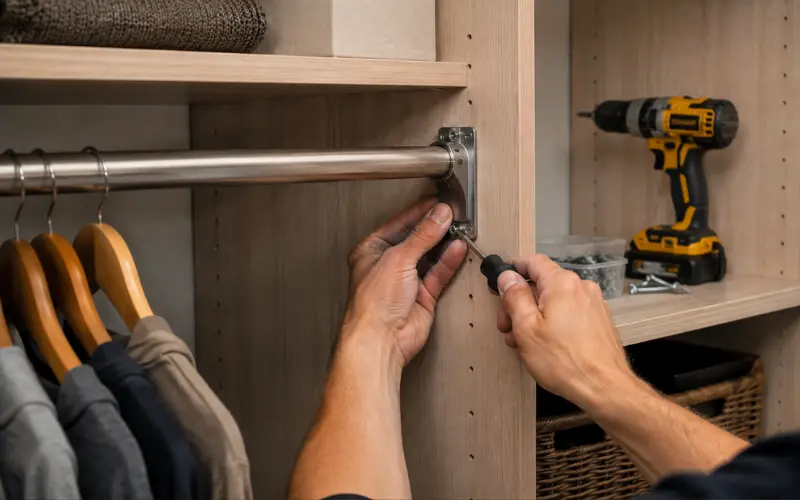
This is the mistake nobody warns you about. A rod bracket rated for 20 pounds looks identical to one rated for 50, but the weight of a fully loaded coat and sweater section adds up fast. Six winter coats alone can hit 15 to 20 pounds.
Cheap wire shelving is the worst offender. It sags within a year under sustained weight, especially in humid climates where wood swells and wire stretches at the connection points.
A quick expert note: when I rebuilt a closet that had sagged after 18 months, the culprit wasn’t the wood, it was drywall anchors used instead of hitting a stud. Anchors rated for 50 pounds in a lab test behave very differently once the load shifts every time someone grabs a hanger.
What actually holds up:
- Attach shelf and rod supports directly into studs wherever possible.
- If you must use anchors, choose toggle bolts rated for at least double your expected load.
- For a center rod section, add a mid-span support bracket if the span exceeds 32 inches, even if the rod “feels” sturdy when empty.
Mistake 3: Underestimating the Real Cost Comparison
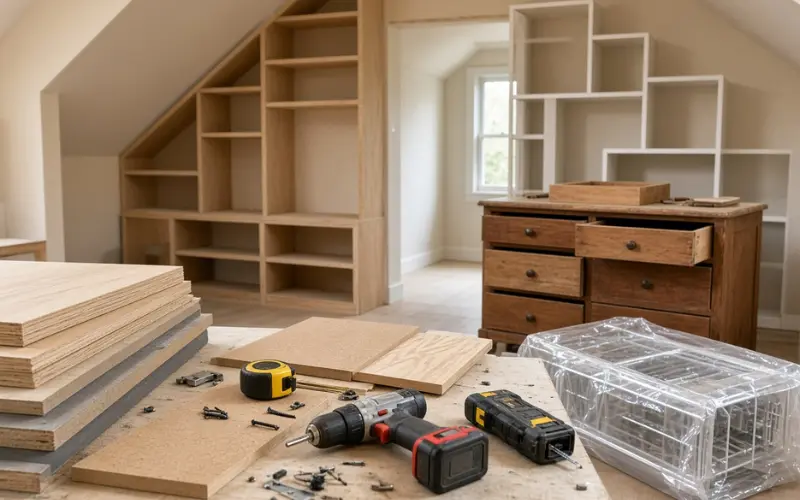
DIYers often assume “build from scratch” is always cheapest and a kit is always a shortcut with a markup. That’s not consistent. Plywood, hardware, paint or laminate, and tools you don’t already own can push a from-scratch build close to kit pricing, especially for a first project where mistakes mean rebuying material.
| Approach | Typical Cost Range (per closet) | Skill Level | Best For |
|---|---|---|---|
| Build from scratch (plywood/MDF) | $150–$500 | Intermediate to advanced | Custom-shaped or oddly sized closets |
| Modular DIY kit (wire or laminate) | $100–$400 | Beginner | Standard rectangular closets |
| Repurposed furniture (dressers, cabinets) | $0–$200 | Beginner | Budget builds, small closets |
| Professional installation | $1,500–$5,000+ | None (hired out) | No time or tools for DIY |
If your closet has an unusual shape, angled ceiling, or you’re combining a walk-in robe design with a dressing area, building from scratch usually wins on cost because pre-made kits struggle with non-standard dimensions.
Mistake 4: Forgetting Ventilation and Lighting Until the End
A closed, well-organized closet with no airflow traps moisture, which leads to musty clothes and, in worse cases, mildew on wood shelving. This gets overlooked because it’s invisible during the planning phase.
Build these in from the start, not as an afterthought:
- Leave at least a half-inch gap between shelving and the back wall for air movement.
- If the closet has a solid door, consider louvered doors or a vent to reduce trapped humidity.
- Plan lighting wiring before you install shelving, not after. Running an extension cord through a finished closet is a fire risk that inspectors flag constantly.
If you’re working on a small wardrobe design, ventilation matters even more because tighter spaces trap humidity faster than open walk-ins.
Mistake 5: Designing for Today’s Wardrobe, Not the Next Five Years
This is the mistake that turns a “finished” project into a redo eighteen months later. A closet built exactly to fit your current clothes leaves no room for seasonal rotation, gifts, or a growing family.
Instead of maximizing every inch for what you own right now, build in:
- One empty shelf section for overflow or seasonal swaps.
- Adjustable shelf pins or a modular rod system instead of fixed-height shelves.
- Extra rod length calculated at 1 inch per hanger for adult clothing, then add 20 percent buffer.
Fixed shelving that can’t move is the most common regret DIYers mention after living with a finished closet for a year.
Mistake 6: Wasting Corner Space in Small or Awkward Closets
Corners are the most commonly wasted real estate in a DIY Custom Closet. A straight run of shelving that stops short of the corner leaves a dead zone that’s too narrow to use and too wide to ignore.
Corner-specific fixes that work:
- Angle a shelf diagonally across the corner instead of stopping shelving flush with the wall.
- Use a rotating corner caddy for shoes or folded items.
- If the closet connects to another storage area, borrow ideas from corner cupboard solutions designed for the same dead-space problem in kitchens.
This matters most in reach-in closets and any project inspired by a modern small dressing room design, where every inch has to earn its place.
A Quick Gut Check Before You Start
Before buying materials, walk through these questions honestly:
- Have I measured obstacles, not just wall length?
- Am I attaching to studs wherever weight is involved?
- Have I priced out my actual material list against a kit, not a guess?
- Is airflow and lighting part of the plan, not an afterthought?
- Does the layout leave room to grow?
- Have I planned for corners specifically, not just straight runs?
If you can answer yes to all six, you’re ahead of most first-time DIY Custom Closet builders.
Frequently Asked Questions on DIY Custom Closet
Is it cheaper to build or buy a custom closet?
Building from scratch is usually cheaper for oddly shaped or non-standard closets, while a modular kit often wins on cost and speed for a standard rectangular space.
How much does it cost to build a DIY Custom Closet?
A DIY build typically runs $150 to $500 depending on materials, while professional installation often starts around $1,500.
How hard is it to build your own closet?
It’s a beginner-to-intermediate project if you’re using pre-cut shelving and wire systems, but building from raw plywood requires more woodworking confidence, especially for weight-bearing sections.
Can I build a custom closet myself without power tools?
Yes, but it limits you to pre-cut kits or repurposed furniture rather than custom plywood cuts, since accurate cuts are hard to achieve with hand tools alone.
What’s the biggest mistake people make in DIY Custom Closet organization?
Skipping stud location for hardware. Weight-bearing rods and shelves anchored only into drywall are the leading cause of DIY Custom Closet failures within the first year.
How do I know if my closet rod will hold enough weight?
Check the bracket’s rated load, then compare it against your actual hanger count. As a rule of thumb, add a center support if the rod span exceeds 32 inches.
Should I use plywood or MDF for a DIY custom closet?
Plywood holds screws better and resists sagging under weight, making it the better choice for load-bearing shelves, while MDF works fine for decorative or lightweight sections.
Do custom closet kits fit non-standard closet shapes?
Not always. Kits are designed around standard rectangular dimensions, so angled ceilings, odd corners, or narrow reach-ins often need at least partial custom framing.

