
A wet room only works long-term if the waterproofing, floor slope, drainage capacity, and subfloor structure are checked and confirmed before a single tile goes down. Skip any one of these and you’re not looking at a design flaw, you’re looking at a leak behind your walls within a year or two. Get them right, and a wet room is one of the lowest-maintenance, most accessible bathroom layouts you can build.
Most articles on wet rooms show you pretty photos or list pros and cons. Almost none of them walk you through the actual pre-installation checklist a contractor should be running before quoting the job. That’s the gap this guide fills.
Confirm Your Subfloor Can Handle the Weight and Moisture Load
A wet room isn’t just a shower without a door. It’s an entire room built to withstand constant water exposure, and that starts below the tile.
Check the subfloor material first. Plywood subfloors need a waterproof membrane rated for full immersion, not just splash resistance. Concrete subfloors handle moisture better but still need a tanking system if you’re going below-grade or over a basement.
Then check structural capacity. Tiled wet rooms with a mortar bed and drainage layer add real weight, sometimes 15 to 25 pounds per square foot more than a standard tiled floor. Older homes with joists spaced for lighter loads may need reinforcement before the wet room goes in. This is the one item almost every “wet room ideas” article skips entirely, and it’s the one that causes the most expensive fixes if missed.
Verify the Floor Has a Genuine Fall Toward the Drain
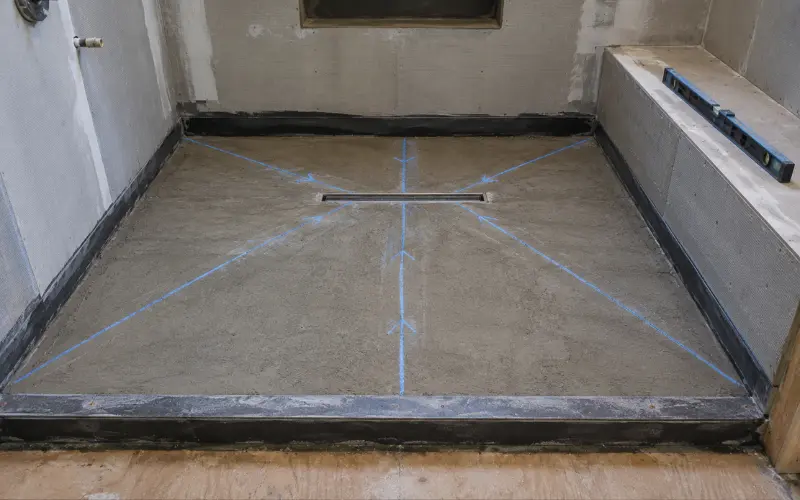
Water needs somewhere to go, and gravity is doing all the work.
A proper wet room floor needs a fall of roughly 1:80 (about 12mm drop per meter) toward the drain, tapering evenly from every direction. Anything flatter and you’ll get standing puddles. Anything steeper and the floor feels uneven underfoot, which becomes a real slip risk for anyone using the room with limited mobility.
Ask your installer to show you the fall gradient on paper before tiling starts, not after. Once tile is set, correcting a bad slope means tearing the whole floor back out.
Check Drain Capacity Against Your Shower Output
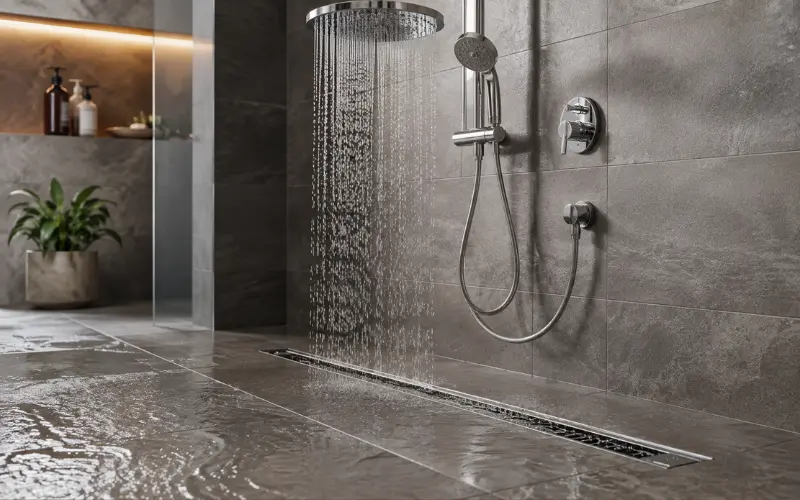
This is the calculation most homeowners never think to ask about. Your drain needs to handle more water per minute than your showerhead puts out, with margin to spare.
A standard rainfall showerhead can push out 2.5 to 3 gallons per minute. A standard point drain handles roughly that same range on a good day, which means there’s zero buffer if the drain gets even slightly blocked by hair or soap scum. For a wet room, a linear drain rated for a higher flow rate, paired with a slightly steeper fall right at the channel, gives you breathing room.
If you’re installing a rainfall head, dual showerheads, or a handheld alongside a fixed head, size the drain for the combined output, not just one fixture running at a time.
Get Written Confirmation on Waterproofing Method and Warranty
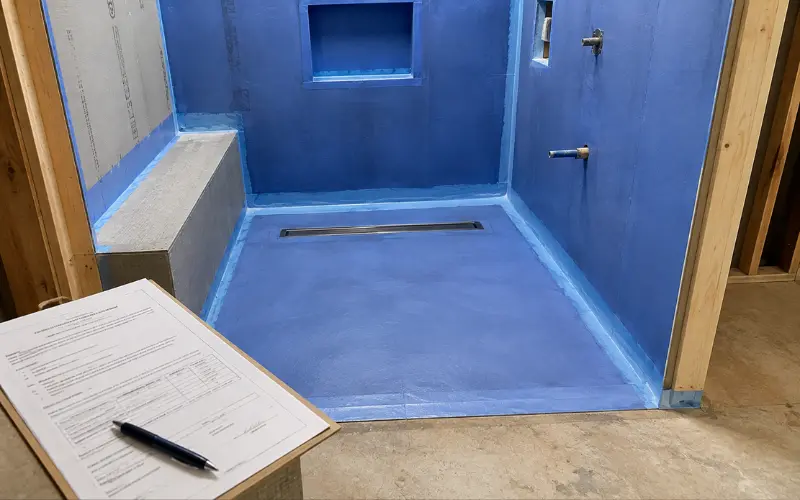
There are two common tanking approaches: liquid membrane systems and sheet membrane systems. Both work, but they’re applied differently and have different failure points.
- Liquid membranes are painted or rolled on in multiple coats and are better for irregular shapes or lots of corners, but they depend heavily on correct application thickness.
- Sheet membranes are more consistent out of the box but need careful seam and corner detailing where pipes and drains penetrate.
Whichever method your installer uses, ask for the manufacturer’s warranty length in writing, not just verbally. Most quality tanking systems carry a 10 to 25 year warranty, but that warranty is void if the installer deviates from the manufacturer’s application instructions. Get the product name and installation method documented in your contract.
A note from experience: the single most common wet room failure I’ve seen isn’t bad tile work, it’s a waterproofing membrane that was never inspected before the tile went over it. Once tile is down, you can’t see a pinhole gap in the membrane until water’s already found it. If your contractor won’t let you (or an inspector) look at the bare membrane before covering it, that’s a red flag worth pausing on.
Plan Ventilation Before You Plan Tile Color
Without a shower door or curtain holding in steam, a wet room releases humidity across the entire bathroom, not just one corner. If the ventilation isn’t sized correctly, that moisture settles into grout, drywall, and any wood trim in the room.
Look for an extractor fan rated for at least 15 air changes per hour for the room’s cubic footage, and make sure it vents outside the house rather than into an attic space. If the wet room shares space with a vanity or bathroom vanity ideas you’re set on, factor in that cabinetry and moisture don’t mix well without adequate airflow running constantly during and after use.
Underfloor heating is worth checking too. It’s not just a comfort upgrade, it actively speeds up floor drying between uses, which cuts down on the damp, cold feel that open shower areas are sometimes criticized for.
Check Local Building Codes and Permit Requirements Before You Book a Contractor
Wet room regulations vary more by municipality than most homeowners expect. Some jurisdictions require a licensed waterproofing inspection before drywall or tile can proceed. Others have specific rules on floor drain sizing, GFCI outlet placement near open water zones, or minimum slope requirements that differ from manufacturer recommendations.
Call your local building department directly, not just your contractor, and ask what permits and inspections apply to a full wet room conversion in your area. This step alone prevents the majority of costly rework that happens when a finished wet room fails inspection.
Confirm Insurance and Resale Implications
A poorly documented wet room can complicate two things down the line: insurance claims and resale.
If water damage ever occurs, insurers often ask for proof that waterproofing was installed to code by a licensed professional. Keep every receipt, product spec sheet, and photo of the bare membrane before it was tiled over. This paperwork is what separates a covered claim from a denied one.
On resale, buyers in some markets see a wet room as a premium feature; in others, particularly regions where bathtubs are still expected in at least one bathroom, it can be viewed as a limitation. If your home has only one full bathroom, converting it entirely to a wet room without a tub is worth reconsidering, or at minimum discussing with a local real estate agent before you commit.
Quick Reference: What to Verify Before Installation Begins
| Item to Check | Why It Matters |
|---|---|
| Subfloor material and structural load capacity | Prevents sagging or cracking under added weight |
| Floor fall/gradient toward drain | Stops standing water and slip hazards |
| Drain flow rate vs. showerhead output | Avoids overflow and backup |
| Waterproofing membrane type and warranty | Protects against hidden leaks for years |
| Ventilation and extractor fan rating | Controls humidity and mold risk |
| Local permits and code requirements | Avoids failed inspections and rework |
| Insurance documentation | Protects you if water damage occurs later |
If you’re weighing a full wet room against a more contained option, it’s worth browsing a few modern wet room bathroom layouts and a frameless shower screen setup side by side. A frameless screen with a proper dry zone gives you a lot of the open, minimal look without needing the entire room tanked.
For smaller footprints, this checklist matters even more since there’s less room for error in slope and drainage. If you’re working with a compact layout, a small wet room style still needs the same fall gradient and drain sizing as a larger one, just executed with tighter tolerances.
FAQ
What is the average cost of a wet room?
Costs vary widely by region and finish, but the waterproofing and drainage work typically adds several thousand dollars over a standard shower remodel, with full tile finishes at the higher end of that range.
What are the disadvantages of having a wet room?
The main drawbacks are higher upfront installation cost, potential for water to spread beyond the shower zone if drainage isn’t sized correctly, and reduced privacy in an open layout without a separating screen.
What is the purpose of a wet room?
A wet room creates a fully waterproofed, barrier-free bathing space that improves accessibility, simplifies cleaning, and gives small or awkward layouts a more open feel.
Can you have a toilet in a wet room?
Yes, as long as the toilet and any electronics are positioned outside the direct splash zone and the entire floor, including under the toilet, is waterproofed to the same standard as the shower area.
Are wet rooms popular in the US right now?
They’re gaining ground, especially in accessible and aging-in-place remodels, though adoption is still behind the UK and parts of Europe where wet rooms have been standard for longer.
Is a wet room the same as a walk-in shower?
No. A walk-in shower still has a defined shower base or curb; a wet room has no barrier at all, with the entire floor sloped and waterproofed as one continuous surface.
Do wet rooms work in small bathrooms?
Yes, often better than traditional layouts, since removing the shower enclosure and tub frees up visual and physical space, but the drain sizing and slope tolerances need to be even more precise in a tight footprint.
How long does a wet room installation take?
A full wet room conversion typically takes one to two weeks longer than a standard bathroom remodel, mainly due to the extra time needed for membrane curing and slope verification before tiling.

